Settings Menu
The COLDCARD® Settings Menu provides comprehensive controls for customizing your device’s functionality and security. It allows you to manage login preferences, hardware settings, wallet configurations, and more, ensuring you can tailor the device to your specific needs.
The menu options shown are current as of firmware v5.3.3 for Mk4 and v1.2.3Q for Q.

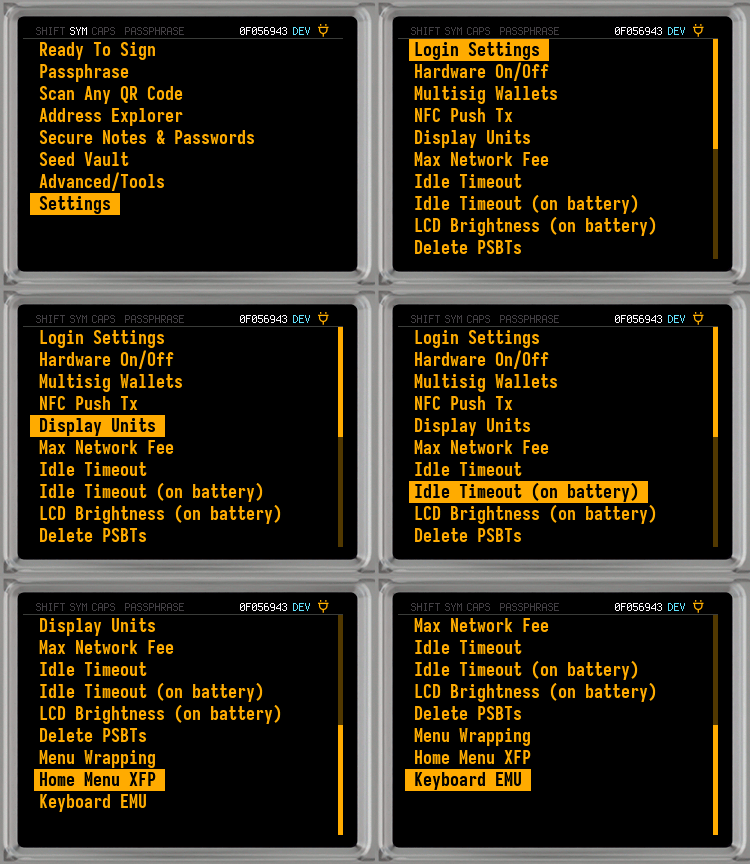
Login Settings#
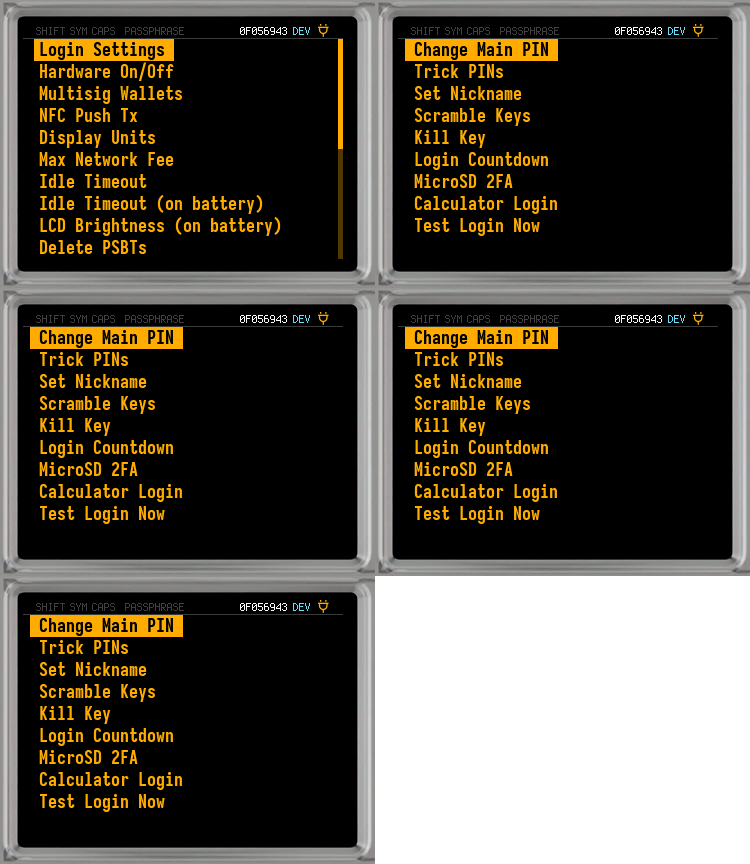
The Login Settings Menu allows you to customize and secure your device's access features. It contains settings that affect the PIN code, startup behavior, and trick/duress options.
Login Settings Menu

Video: Login Settings Overview
-
Change Main PIN#

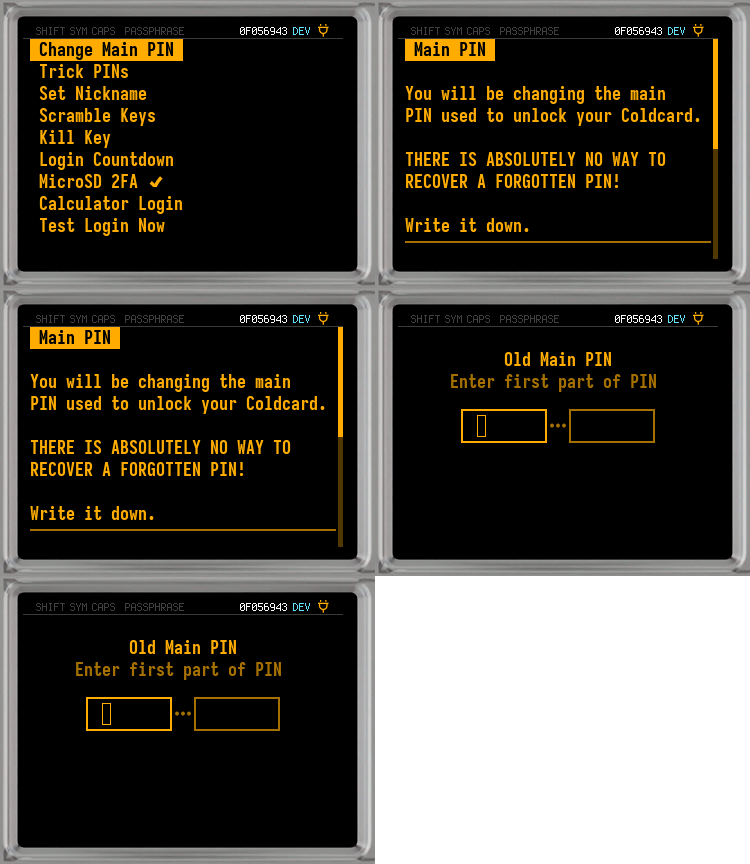
This option changes the PIN you use to unlock your COLDCARD, both prefix and suffix. Since the Main PIN affects your anti-phishing words, changing your PIN also changes your anti-phishing words.
Backup Your PIN
If you've forgotten your PIN, we can't help you! Even if you gave us your COLDCARD and we put all our resources into it, we couldn't crack or break the COLDCARD to get the seed out without the PIN.
Video: Mk4 Change Main PIN
Video: Q Change Main PIN
Steps to Change the Main PIN
1. Select
Change Main PINfrom the Login Settings Menu.2. Press
OK/ENTERafter reading the warning screen.3. Use your current Main PIN to complete the typical login process.
4. Enter your new Main PIN prefix and write down your new anti-phishing words.
5. Enter your new Main PIN suffix.
6. Confirm your new Main PIN by repeating the login process.
7. Your COLDCARD will save and verify the change and return to the Login Settings Menu.
-
Trick PINs#

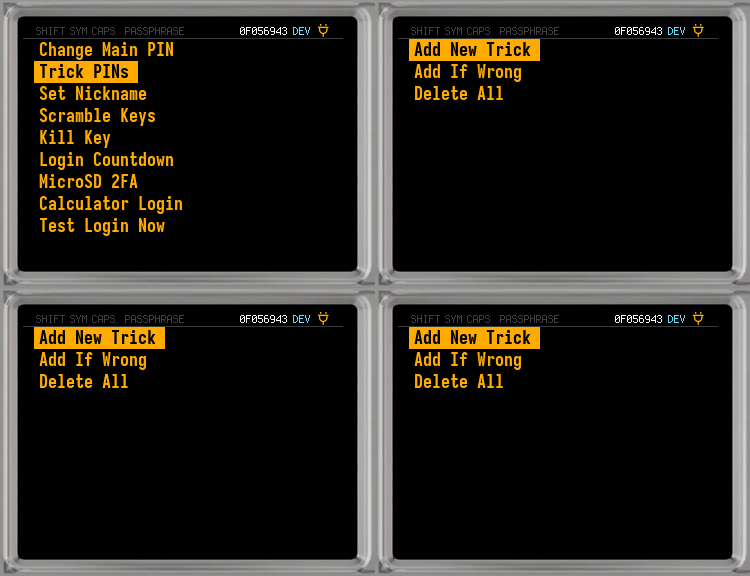
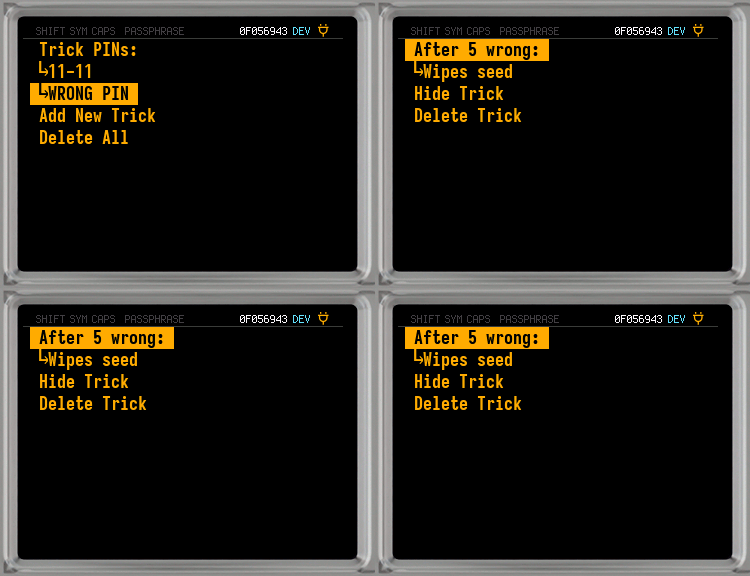
Trick PINs are a security feature that allow you to enter a PIN other than your Main PIN, and are configured to trigger specific actions including: bricking the device, wiping the seed, or opening a duress wallet.
You can have many Trick PINs on the COLDCARD, with each one performing unique actions.
COLDCARD Guide: Trick PINs
Video: Trick PINs Overview
-
Add New Trick#
This will create a new Trick PIN and configure what the COLDCARD does when it is entered.
1. Select
Add New Trickfrom the Trick PINs Menu.2. Enter the Trick PIN prefix and take note of the anti-phishing words.
3. Enter the Trick PIN suffix.
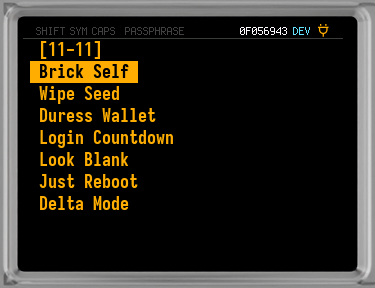
4. Choose the action(s) performed when entering this Trick PIN in place of your Main PIN:
New Trick PIN Menu#

-
Brick Self#
Video: Proper COLDCARD Disposal
The COLDCARD becomes completely useless, and will only display the word
Brickedforever.Be careful with bricking the COLDCARD!
The destruction process is quick and irreversible. You cannot reuse a bricked COLDCARD; discard it as e-waste.
-
Wipe Seed#
Wipe the seed and maybe do more. These are the options:
Consequences of Wiping Seed Words
Wiping your seed words will result in the loss of access to the Bitcoin, passwords, notes, and settings stored on your device. You can regain access to them by restoring your seed words from backup.
-
Wipe & Reboot#
The seed is wiped, and the COLDCARD reboots without any notice.
-
Silent Wipe#
The seed is silently wiped, and the COLDCARD acts as if the PIN was just entered incorrectly.
-
Wipe -> Wallet#
The seed is silently wiped, and the COLDCARD logs into one of the following duress wallets:
- BIP-85 Wallet #1
- BIP-85 Wallet #2
- BIP-85 Wallet #3
- Legacy Wallet
Most users should use one of the three BIP-85 wallets. The legacy wallet should only be used for compatibility reasons.
-
Say Wiped, Stop#
The seed is wiped and the COLDCARD will display a message saying:
Seed is wiped, Stop.
-
-
Duress Wallet#
Goes directly to a specific duress wallet. No side effects.
The duress wallet is a personal safety feature. Create a duress wallet and add funds you are willing to lose. If you must reveal a PIN under duress, give the duress PIN instead of your Main PIN. To avoid alerting attackers, the COLDCARD will function as usual. Be aware that an attacker with enough technical expertise could detect the difference.
These are the wallet options:
- BIP-85 Wallet #1
- BIP-85 Wallet #2
- BIP-85 Wallet #3
- Legacy Wallet
Most users should use one of the three BIP-85 wallets. The legacy wallet should only be used for compatibility reasons.
Video: Duress Wallet Setup
-
Login Countdown#
Pretends a login countdown timer (1 hour) is in effect. These are the choices:
-
Wipe & Countdown#
The seed is wiped before the countdown begins.
Consequences of Wiping Seed Words
Wiping your seed words will result in the loss of access to the Bitcoin, passwords, notes, and settings stored on your device. You can regain access to them by restoring your seed words from backup.
-
Countdown & Brick#
Video: Proper COLDCARD Disposal
Does the countdown and then the system is bricked.
Be careful with bricking the COLDCARD!
The destruction process is quick and irreversible. You cannot reuse a bricked COLDCARD; discard it as e-waste.
-
Just Countdown#
Just shows the countdown timer. No effect on the seed.
-
-
Look Blank#
Look and act like a freshly wiped COLDCARD, but does not affect the actual seed.
-
Just Reboot#
Reboot when this PIN is entered. Doesn't do anything else.
-
Delta Mode#
ADVANCED!
Logs into REAL seed and allows attacker to do most things, but will produce incorrect signatures when signing PSBT files. Wipes seed if they try to do certain actions that might reveal the seed phrase, but still a somewhat riskier mode.
For this mode only, Trick PIN must be the same length as the true Main PIN and differ only in the final 4 positions (ignoring dash).
-
-
Add If Wrong#
After N incorrect PIN attempts, this feature will be triggered. It can wipe the seed phrase, and/or brick the COLDCARD.
Regardless of this (or any other setting) the COLDCARD will always brick after 13 failed PIN attempts.
Video: Add If Wrong Setup
1. Select
Add If Wrongfrom the Trick PINs Menu.2. Read the information, press
OK/ENTER.3. Select the number of incorrect PIN attempts to activate this feature. If left blank, this will activate on any incorrect PINs.
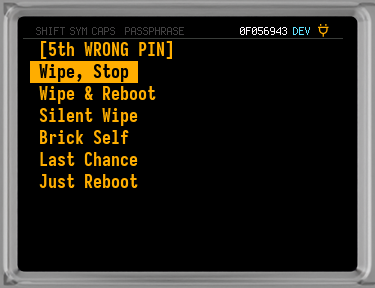
4. Choose what the COLDCARD will do on the selected number of incorrect PINs:
Add If Wrong PIN Menu#

-
Wipe, Stop#
The seed is wiped and the COLDCARD will display a message saying:
Seed is wiped, Stop.Consequences of Wiping Seed Words
Wiping your seed words will result in the loss of access to the Bitcoin, passwords, notes, and settings stored on your device. You can regain access to them by restoring your seed words from backup.
-
Wipe & Reboot#
The seed is wiped and the COLDCARD reboots without notice.
Consequences of Wiping Seed Words
Wiping your seed words will result in the loss of access to the Bitcoin, passwords, notes, and settings stored on your device. You can regain access to them by restoring your seed words from backup.
-
Silent Wipe#
The seed is silently wiped and the COLDCARD acts as if the PIN code was just wrong.
Consequences of Wiping Seed Words
Wiping your seed words will result in the loss of access to the Bitcoin, passwords, notes, and settings stored on your device. You can regain access to them by restoring your seed words from backup.
-
Brick Self#
Video: Proper COLDCARD Disposal
The COLDCARD becomes completely useless, and will only display the word
Brickedforever.Be careful with bricking the COLDCARD!
The destruction process is quick and irreversible. You cannot reuse a bricked COLDCARD; discard it as e-waste.
-
Last Chance#
Wipe the seed, then give one more try and then brick if one more wrong PIN is entered.
Consequences of Wiping Seed Words
Wiping your seed words will result in the loss of access to the Bitcoin, passwords, notes, and settings stored on your device. You can regain access to them by restoring your seed words from backup.
-
Just Reboot#
Reboot when this happens. Doesn't do anything else.
-
-
Delete All#
Remove all Trick PIN codes and special wrong-PIN handling.
-
Edit Trick PINs or Wrong PIN Handling#

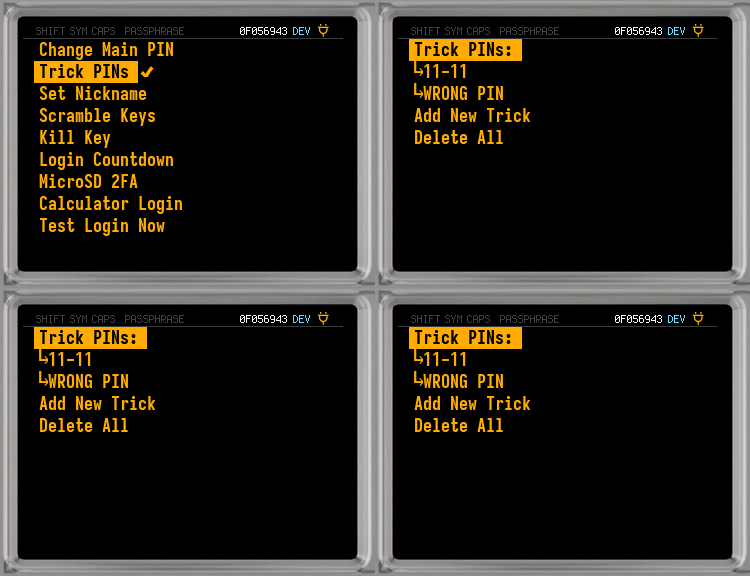
Any existing Trick PINs, or a special wrong-PIN handling, will be at the top of the Trick PINs Menu.
Select an existing Trick PIN, or
WRONG PIN, from the Trick PINs Menu to begin editing it.-
Edit Trick PINs or Wrong PIN Handling Menus#
-
Edit Trick PIN Menu#

-
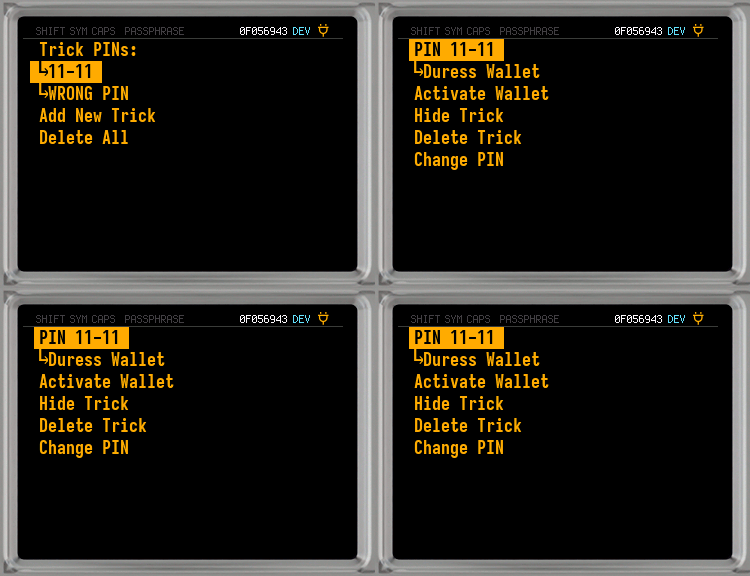
Activate Wallet (Duress Wallet Only)#
This option is only available if the Trick PIN is set to open a duress wallet.
This will temporarily load the secrets associated with this trick wallet so you can perform transactions with it.
To restore normal operation, reboot the COLDCARD, or select
Restore Masterfrom the Main Menu. -
Hide Trick#
This will hide the Trick PIN from the menus, but it will still be in effect.
You can restore it by trying to re-add the same PIN again.
-
Delete Trick#
Delete the Trick PIN.
-
Change PIN#
Change the PIN for this trick.
-
-
-
-
-
Set Nickname#

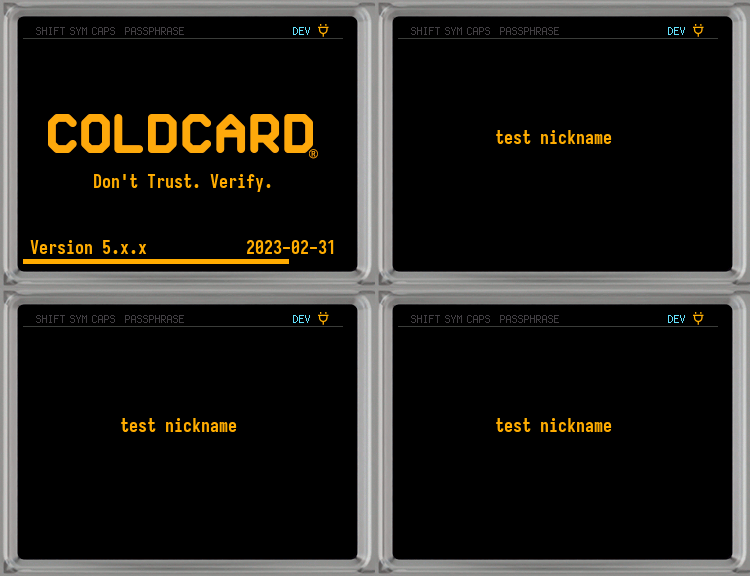
You can give your COLDCARD a personalized name. Once set, it will show this name immediately after turning on your COLDCARD. After viewing your nickname, press any key to proceed to the normal login process.
Video: Mk4: How to Set a Nickname
Video: Q: How to Set a Nickname
-
Scramble Keys#

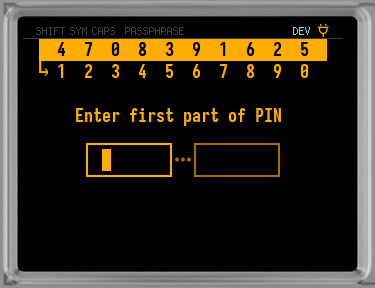
Video: How to Use Scramble Keys
Enabling this feature randomizes the numbers associated with the buttons on the keypad. Cameras and shoulder-surfers watching won't figure out your PIN based on the keys you press.
The scrambled keypad changes for each part of your PIN on the MK4.
Q only: The lower row of numbers represent the keys on your COLDCARD, and the top row shows where those keys are now mapped. For instance, if the prefix of your PIN was
12, you would press79in this example. Scrambled Keys is ignored if Calculator Login is enabled. -
Kill Key#

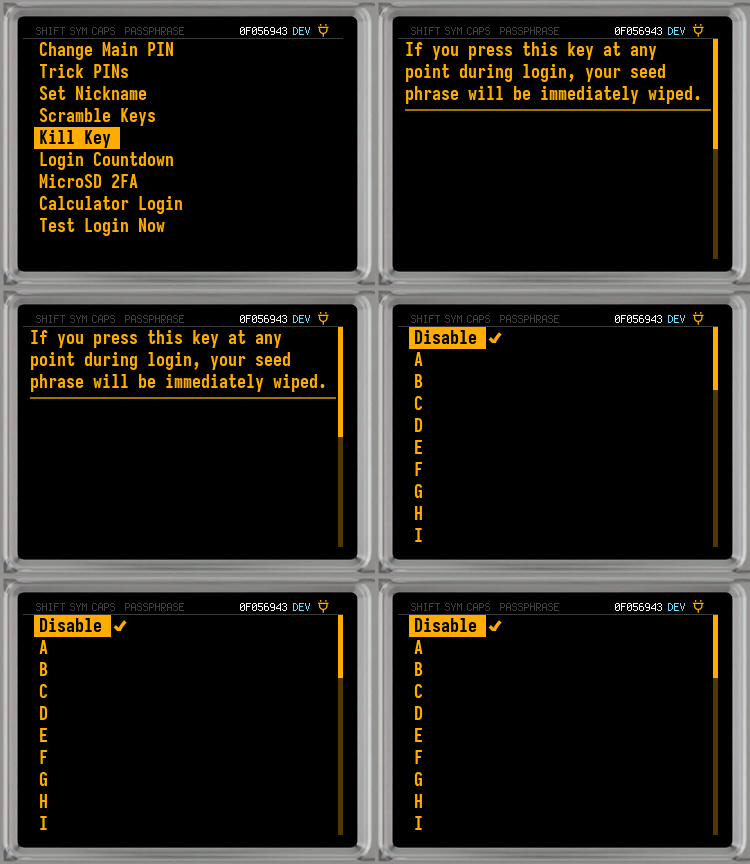
The Kill Key feature allows you to quickly wipe your seed during login by pressing a specific key. Each COLDCARD model handles the Kill Key slightly differently.
Mk4: If you press the Kill Key while viewing the anti-phishing words during login, your seed phrase will be immediately wiped. To avoid accidentally pressing your Kill Key, you must avoid making it the first number of the second half (suffix) of your PIN.
Q: If you press the Kill Key at any point during login, your seed phrase will be immediately wiped. The Kill Key is ignored if Calculator Login is enabled.
Consequences of Wiping Seed Words
Wiping your seed words will result in the loss of access to the Bitcoin, passwords, notes, and settings stored on your device. You can regain access to them by restoring your seed words from backup.
-
Login Countdown#

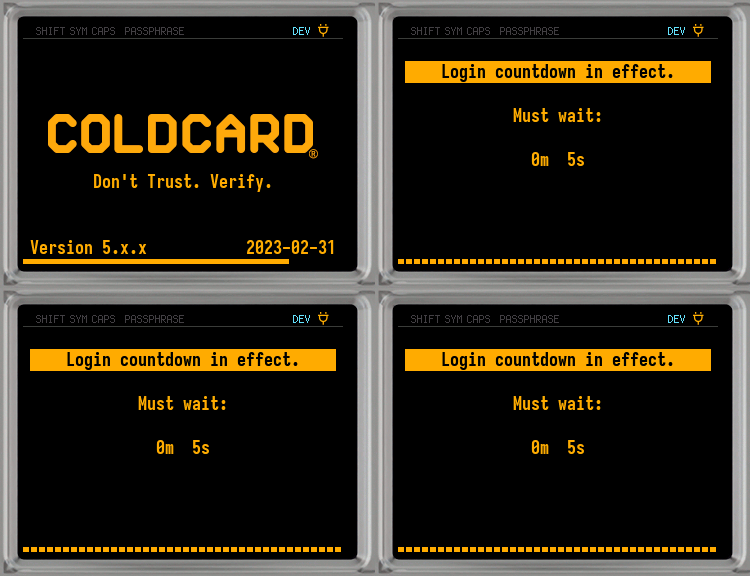
Login Countdown lets you force a time delay when logging in to a COLDCARD. Once enabled, entering your PIN will bring up the
Wait . . .screen before displayingLogin countdown in effect. Must wait:with the selected delay period counting down.Your delay choices are:
- Disabled
- 5, 15, or 30 minutes
- 1, 2, 4, 8, 12, 24, or 48 hours
- 3 days
- 1 week
- 28 days later
When the delay period has elapsed, enter your PIN to unlock your COLDCARD.
Plan ahead when selecting long delays. The COLDCARD requires continuous power for the entire delay period. Consider using an AC power source, charging a battery pack, or connecting to an uninterruptible power supply (UPS).
Countdown Limitations
Unlike most of our security features, the secure element does not impose the delay. Bypassing the delay by opening the plastic case and interacting directly with the hardware may be possible.
We still consider it a good defence against $5 wrench attacks, as physical attackers are not necessarily technical people.
Video: Setup COLDCARD Login Countdown
-
MicroSD 2FA#

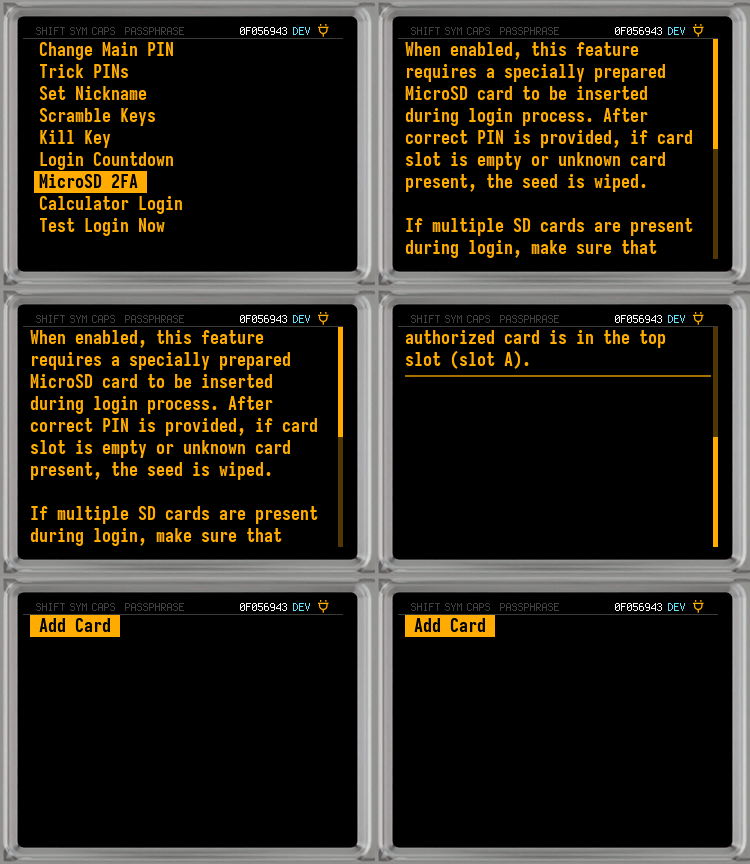
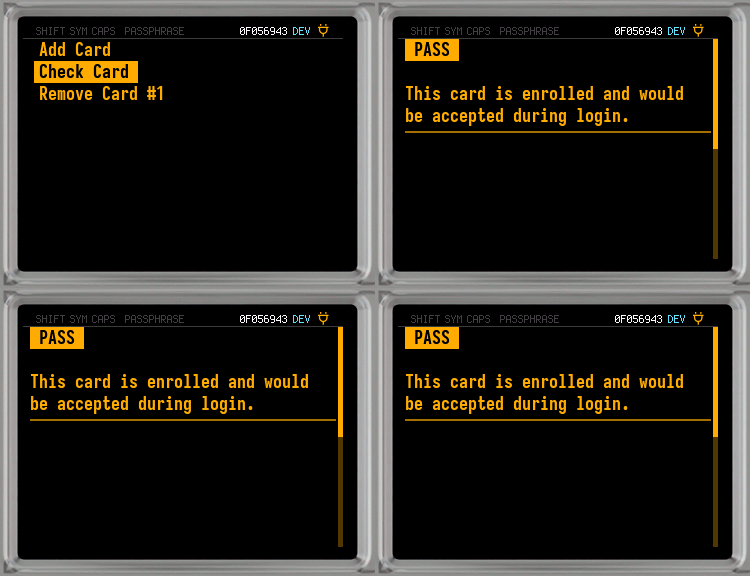
This advanced security feature mandates the presence of a specially prepared MicroSD card during the login process. Upon entering your correct PIN, the device will verify the presence of the MicroSD card. If the card slot is either empty or contains an unrecognized card, the device will automatically wipe the seed.
Q Only: If multiple MicroSD cards are inserted during the login attempt, ensure that the authorized card is placed in the top slot (Slot A).
Consequences of Wiping Seed Words
Wiping your seed words will result in the loss of access to the Bitcoin, passwords, notes, and settings stored on your device. You can regain access to them by restoring your seed words from backup.
COLDCARD Guide: MicroSD 2FA
Steps to Setup MicroSD 2FA
1. Insert the MicroSD card into the COLDCARD. Be sure to use the top slot (Slot A) on the Q.
2. Select
MicroSD 2FAfrom the Login Settings Menu.3. Read the information, press
OK/ENTER.4. Make a selection from these choices (if you have never setup MicroSD 2FA, then
Add Cardwill be your only option):-
Add Card#

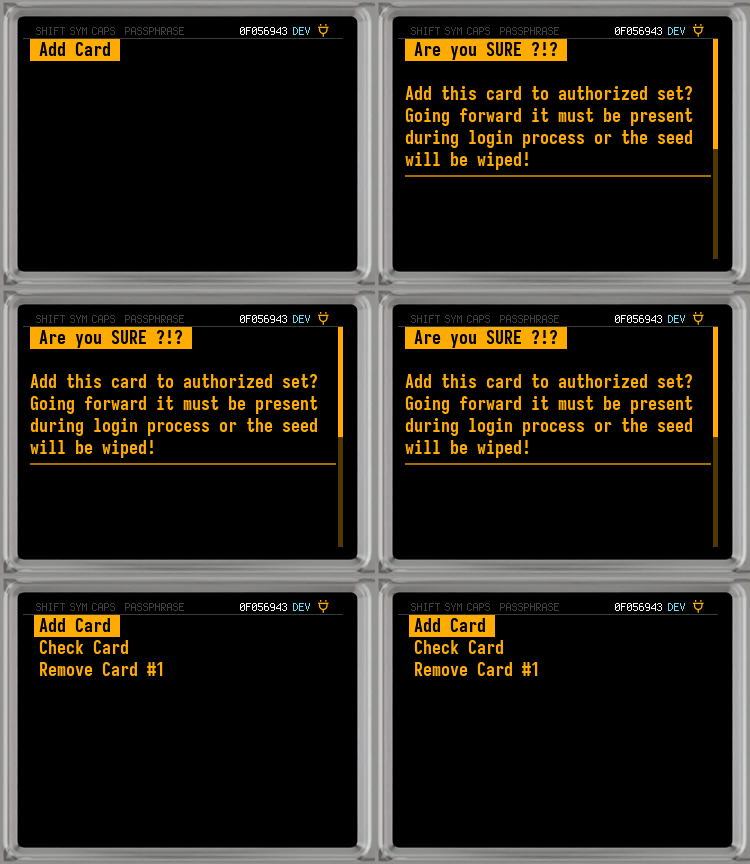
If no MicroSD 2FA is setup, then this options adds the inserted card as the 2FA device. Going forward this card must be present during login process or the seed will be wiped!
If you already have a different MicroSD setup as a 2FA device, then this option allows you to add a new MicroSD card as an additional 2FA device. Going forward this card, or one of the others, must be present during login process or the seed will be wiped.
-
Remove Card #N#

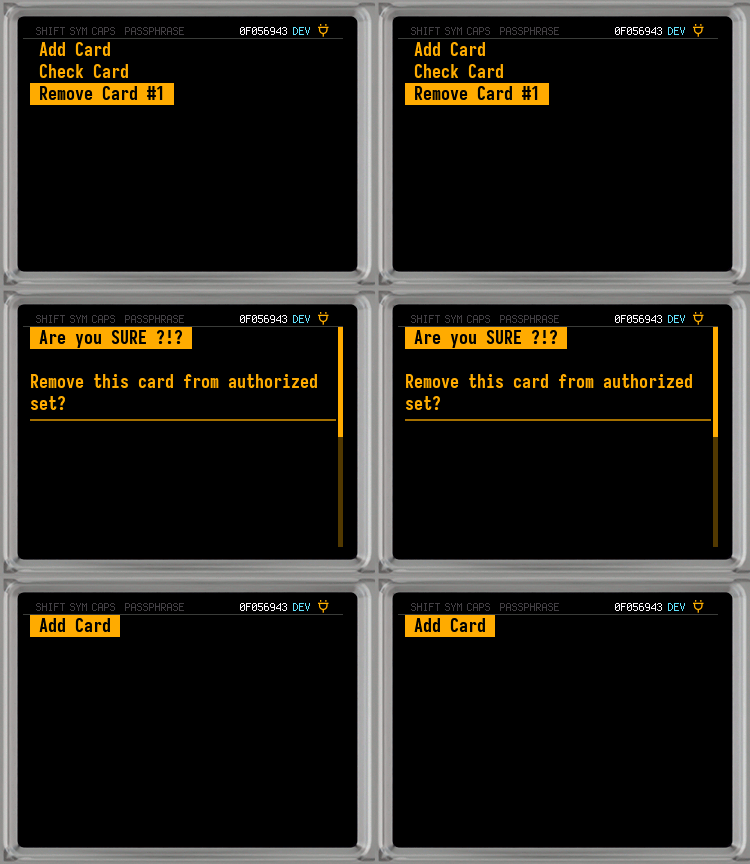
Remove card N from the approved list. When the last card is removed, the feature is disabled and no card will be required for login. Access to the card in question is not required to remove it.
-
-
Calculator Login (Q only)#
Video: How to Enable Calculator Mode
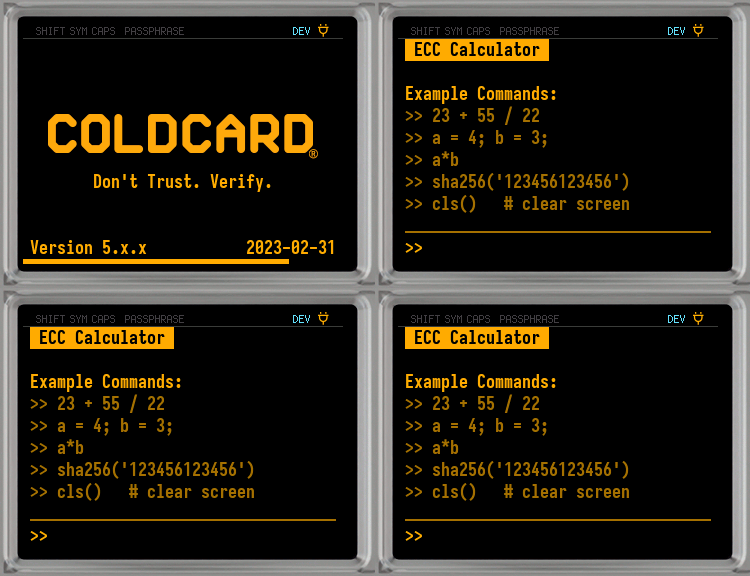
When enabled, the usual PIN entry screen is replaced with a functional calculator.
Enter your PIN as
12-12or12 12to unlock the COLDCARD. To verify anti-phishing words, enter your PIN prefix and a dash:12-.Default Off#
Disable calculator login.
Calculator Login#
Enable calculator login.
-
Test Login Now#
Immediately reboots your COLDCARD and starts the normal login process.
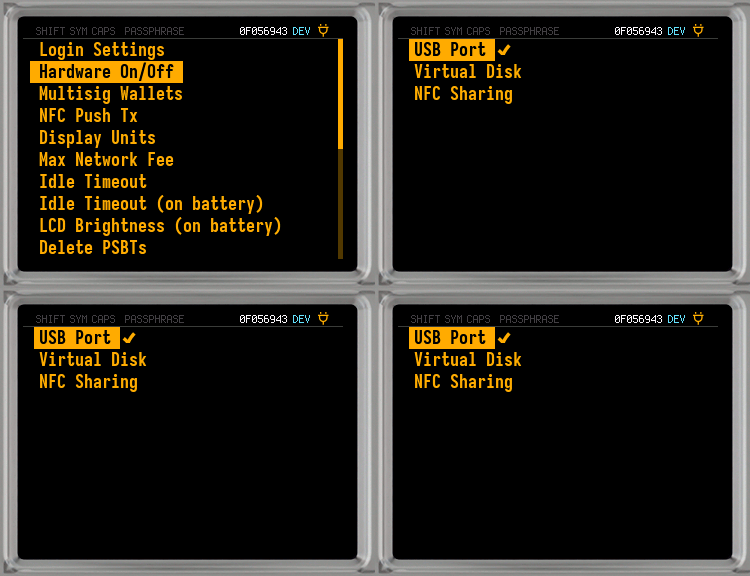
Hardware On/Off#
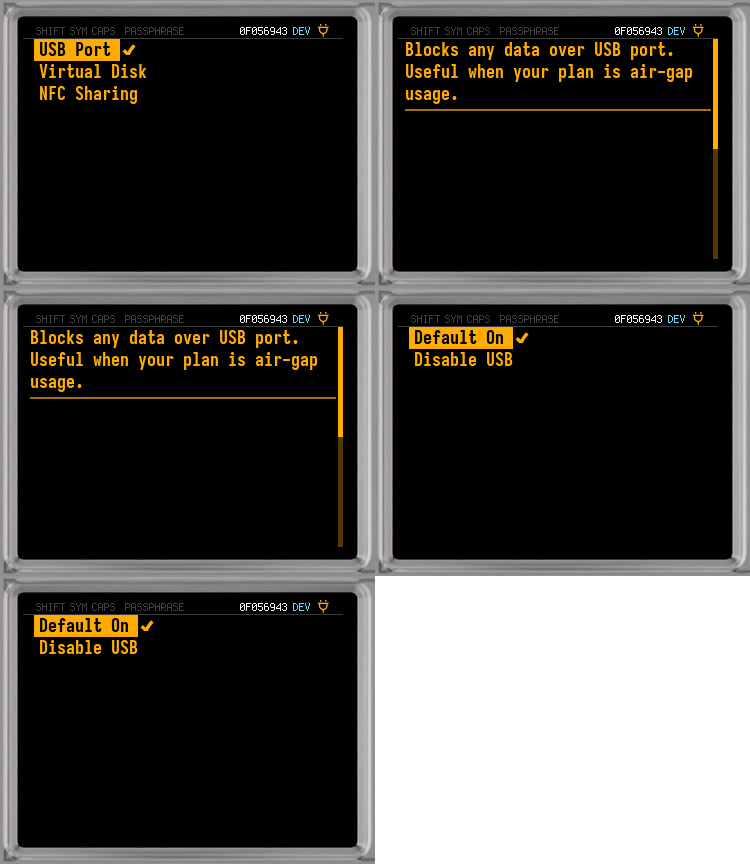
Allows you to manage and control the various hardware interfaces of the COLDCARD, including USB connectivity, Virtual Disk functionality, and NFC communication.
-
Virtual Disk#

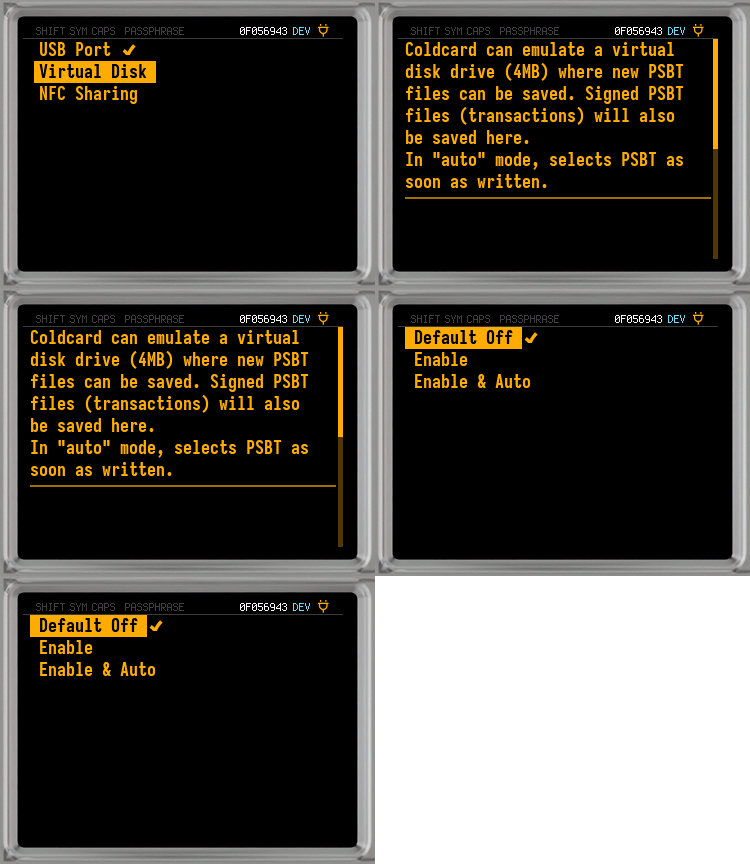
The COLDCARD can emulate a 4MB virtual disk drive where new PSBT files can be saved. Signed PSBT files will also be saved here.
In Auto Mode, the COLDCARD will begin the signing process on PSBT files as soon as they are written to the Virtual Disk.
Video: COLDCARD Virtual Disk Mode
Default Off#
Disable Virtual Disk.
Enable#
Enable Virtual Disk.
-
NFC Sharing#

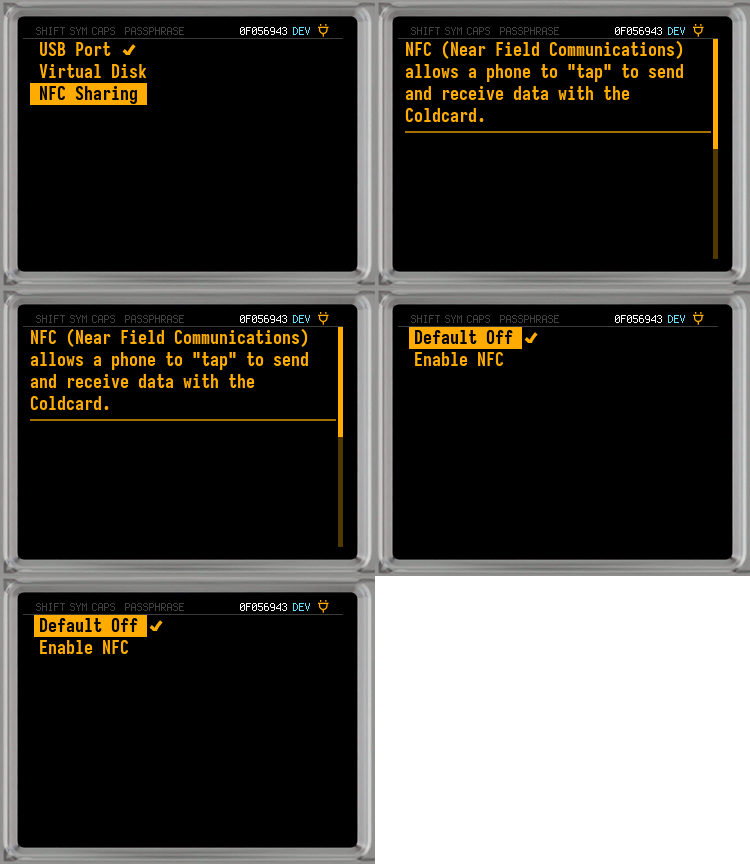
NFC (Near Field Communication) provides a seamless and convenient method for interacting with your COLDCARD device. This technology allows a phone or other NFC-enabled device to effortlessly "tap" the COLDCARD to send or receive data, all while preserving an air gap for enhanced security. The process is swift and user-friendly, making it an excellent choice for those who value efficiency and ease of use in managing their Bitcoin.
However, for users who prioritize the utmost level of security and prefer to eliminate any potential risk, even the minimal exposure associated with NFC, this feature can be disabled. While NFC offers a high degree of convenience, those with heightened security concerns may choose to turn it off to ensure an even stricter adherence to air-gapped security protocols.
Video: Mk4 Enable NFC
Video: Q Enable NFC
COLDCARD Guide: NFC Tools
Default Off#
Disable NFC hardware.
Enable NFC#
Enable NFC hardware.
Multisig Wallets#
The Multisig Wallets Menu is designed for importing, exporting, and managing multisig wallet configurations.
This includes creating Airgap Multisig wallets directly on the COLDCARD, and interacting with existing wallets through detailed management options.
COLDCARD Guide: Airgap Multisig
-
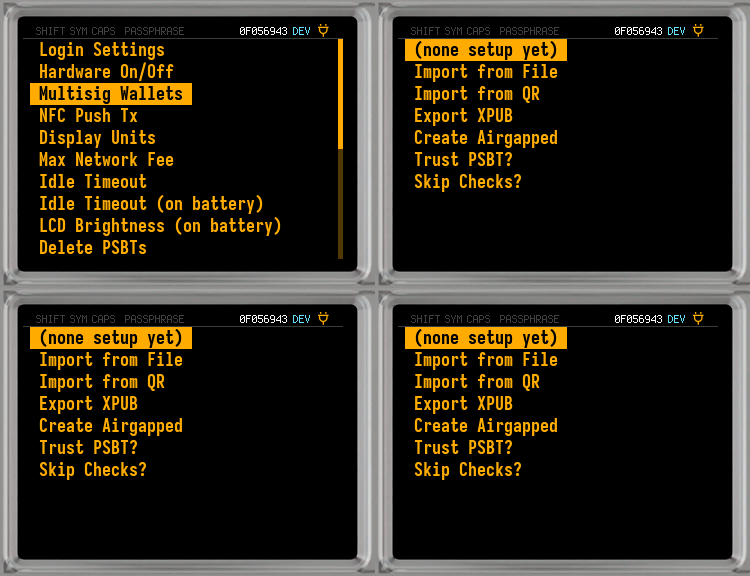
Existing Multisig Wallets#

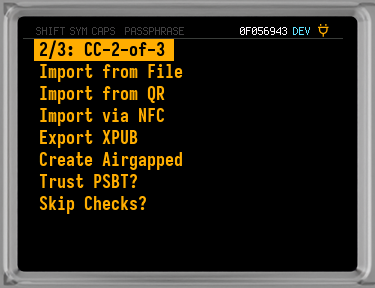
If the COLDCARD knows about any multisig wallets, they will be listed at the top of the Multisig Wallets Menu in place of
(none setup yet).Selecting one of the existing wallets will open a menu for interacting with it.
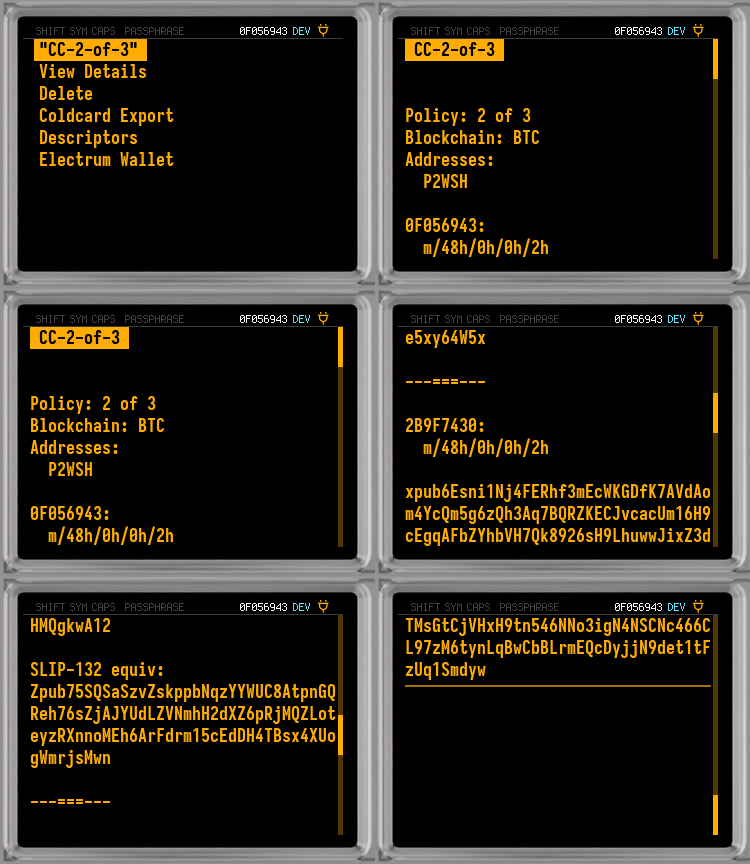
Existing Multisig Wallet Menu#

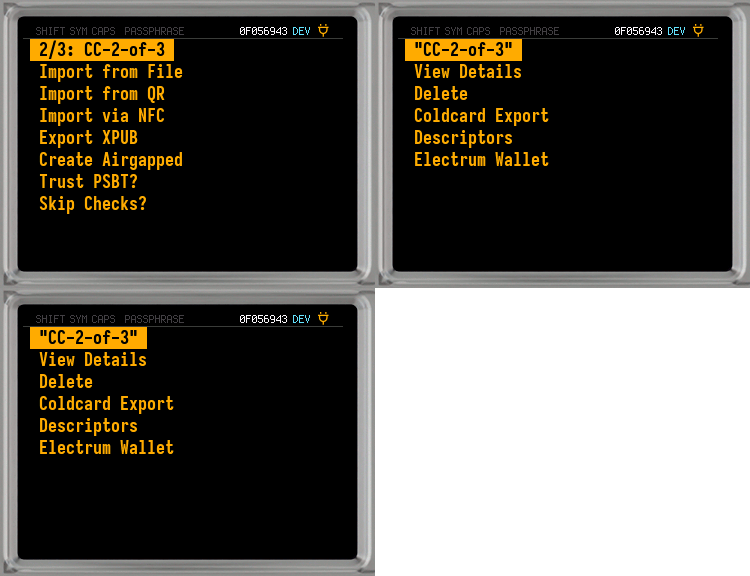
On the Multisig Wallets Menu, select the multisig wallet you would like to interact with.
These are the available options:
Delete#

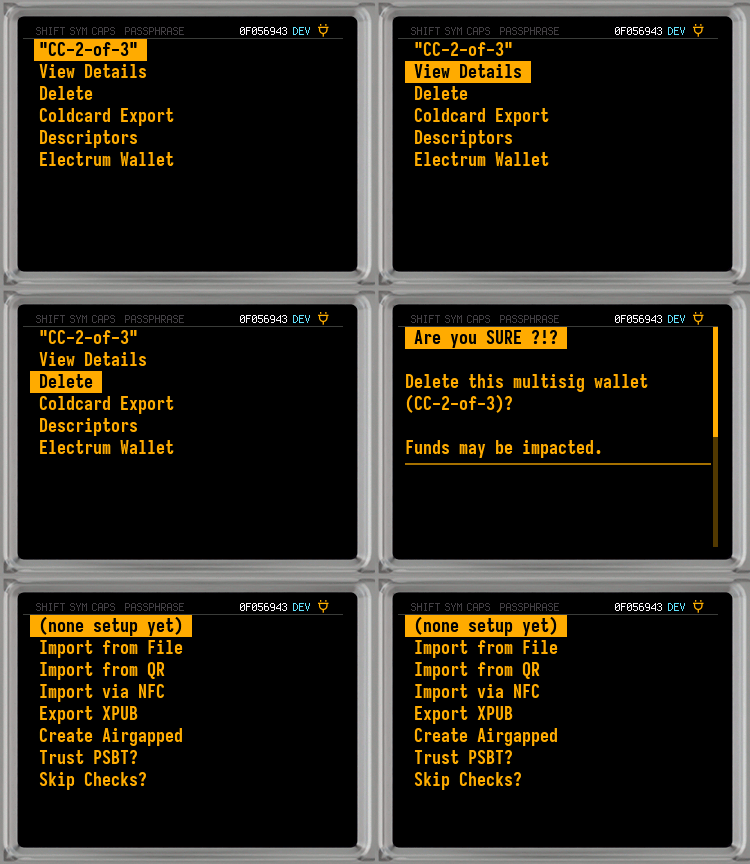
Completely remove the multisig wallet from the COLDCARD.
Make Sure You Have Backups
There is no way to reverse the deletion process. Before you delete a multisig wallet, be sure to have backups.
Coldcard Export#

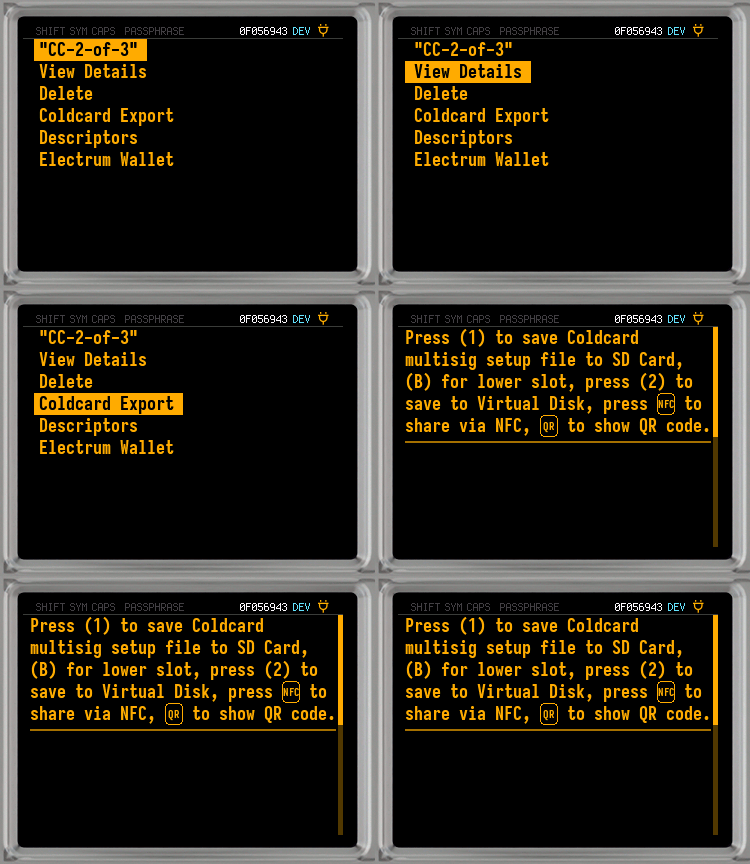
Export the multisig wallet in the COLDCARD export format.
Choose how to export:
- Press
1to export to the MicroSD card (Slot A on the Q).- On the Q only: press
Bto export to the MicroSD card in slot B.- Press
2to export to the Virtual Disk (if enabled).- Press
3on the Mk4, or theNFCkey on the Q, to export via NFC.- On the Q only: press the
QRkey to export via QR code.Descriptors#

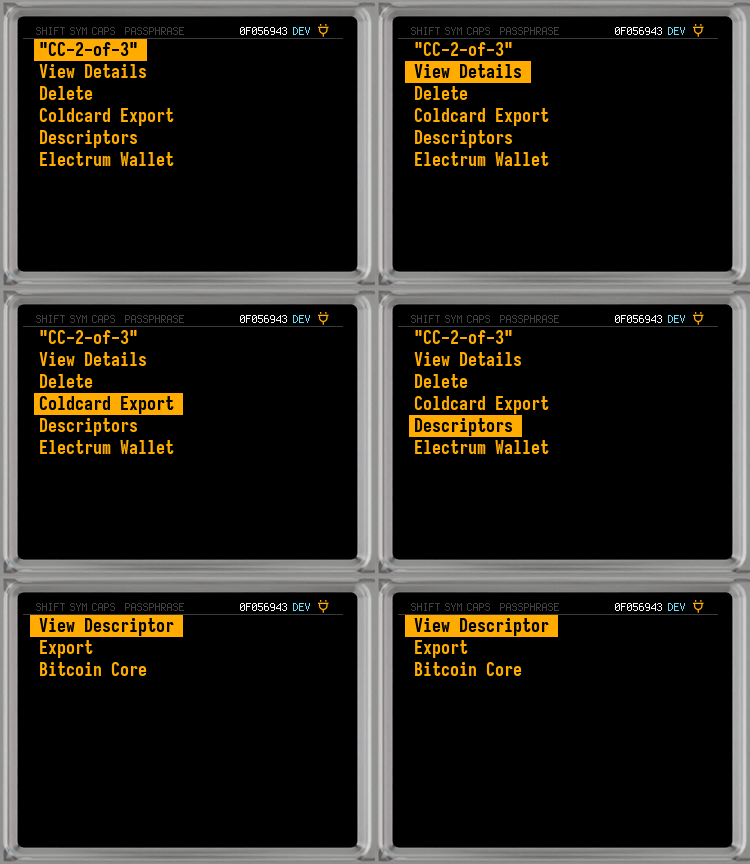
This will open a menu that allows you to view or export the multisig wallet descriptors.
COLDCARD Guide: Export Multisig Descriptors
COLDCARD Guide: Descriptors & Multisig
View Descriptor#
View the BIP-380 descriptor of the multisig wallet. Press
1to export a human readable version.Choose how to export:
- Press
1to export to the MicroSD card (Slot A on the Q).- On the Q only: press
Bto export to the MicroSD card in slot B.- Press
2to export to the Virtual Disk (if enabled).- Press
3on the Mk4, or theNFCkey on the Q, to export via NFC.- On the Q only: press the
QRkey to export via QR code.Export#
Export the multisig wallets BIP-380 descriptor.
Choose how to export:
- Press
1to export to the MicroSD card (Slot A on the Q).- On the Q only: press
Bto export to the MicroSD card in slot B.- Press
2to export to the Virtual Disk (if enabled).- Press
3on the Mk4, or theNFCkey on the Q, to export via NFC.- On the Q only: press the
QRkey to export via QR code.Bitcoin Core#
Export the multisig wallets descriptor in Bitcoin Core format.
Choose how to export:
- Press
1to export to the MicroSD card (Slot A on the Q).- On the Q only: press
Bto export to the MicroSD card in slot B.- Press
2to export to the Virtual Disk (if enabled).- Press
3on the Mk4, or theNFCkey on the Q, to export via NFC.- On the Q only: press the
QRkey to export via QR code.Electrum Wallet#

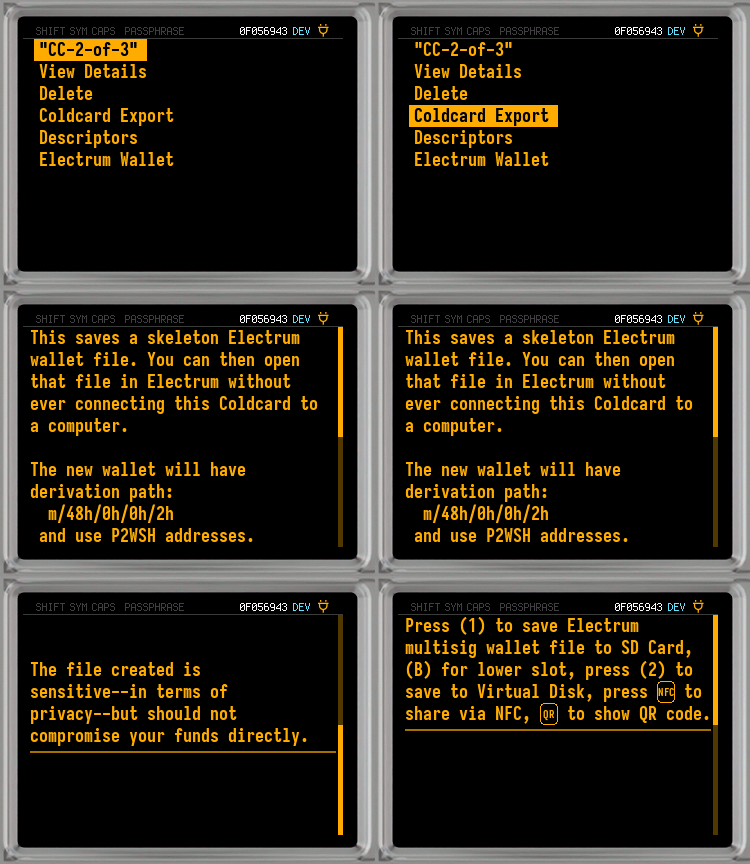
Exports a skeleton Electrum wallet file. You can open that file with an Electrum wallet to have a watch-only copy of the multisig wallet.
Choose how to export:
- Press
1to export to the MicroSD card (Slot A on the Q).- On the Q only: press
Bto export to the MicroSD card in slot B.- Press
2to export to the Virtual Disk (if enabled).- Press
3on the Mk4, or theNFCkey on the Q, to export via NFC.- On the Q only: press the
QRkey to export via QR code.Privacy Sensitive File
The file created is privacy sensitive since it includes the XPUBs of all the wallets involved in the multisig.
-
Import from File#

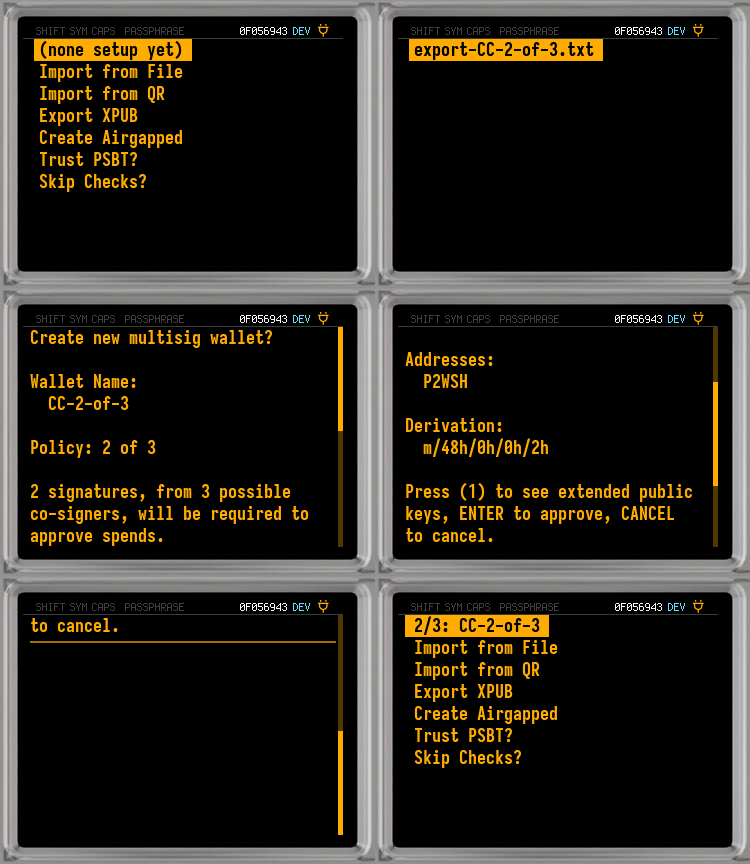
The COLDCARD will check any SD card inserted for multisig wallet export files.
Accepted Formats
The multisig wallet to be imported from file must be one of the following formats:
- COLDCARD Export
- BIP-380 Descriptor
Video: Import Multisig From File
Steps to Import a Multisig Wallet From File
1. Export the multisig wallet file to a MicroSD card.
2. Insert the MicroSD card into the COLDCARD.
3. Select
Import from Fileon the Multisig Wallets Menu.4. Pick the file that was exported in step 1.
5. Review the details.
6. Press
OK/ENTERto import.7. Your multisig wallet has been imported, and can now be found at the top of the Multisig Wallets Menu.
-
Import from QR (Q only)#
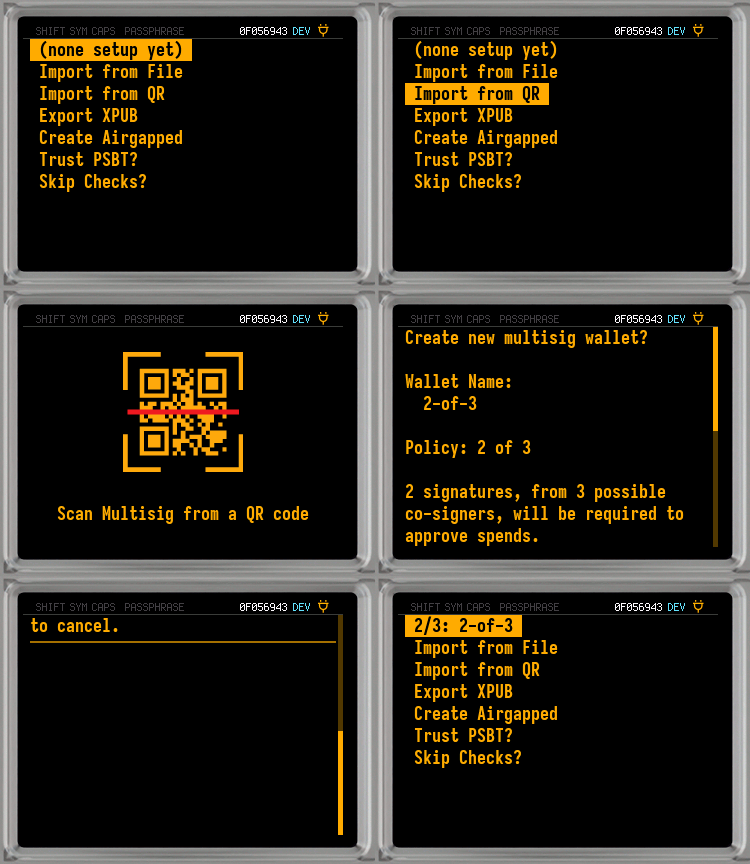
The QR scanner is started. You can scan a QR code containing a multisig wallet in an accepted format.
Accepted Formats
The multisig wallet in the scanned QR code must be one of the following formats:
- COLDCARD Export
- BIP-380 Descriptor
Video: Import Multisig From QR Code
Steps to Import a Multisig Wallet From QR Code
1. Export the multisig wallet file as a QR code.
2. On the COLDCARD, select
Import from QRon the Multisig Wallets Menu.3. Scan the QR code of the exported multisig wallet.
4. Review the details.
5. Press
OK/ENTERto import.6. Your multisig wallet has been imported, and can now be found at the top of the Multisig Wallets Menu.
-
Import via NFC#

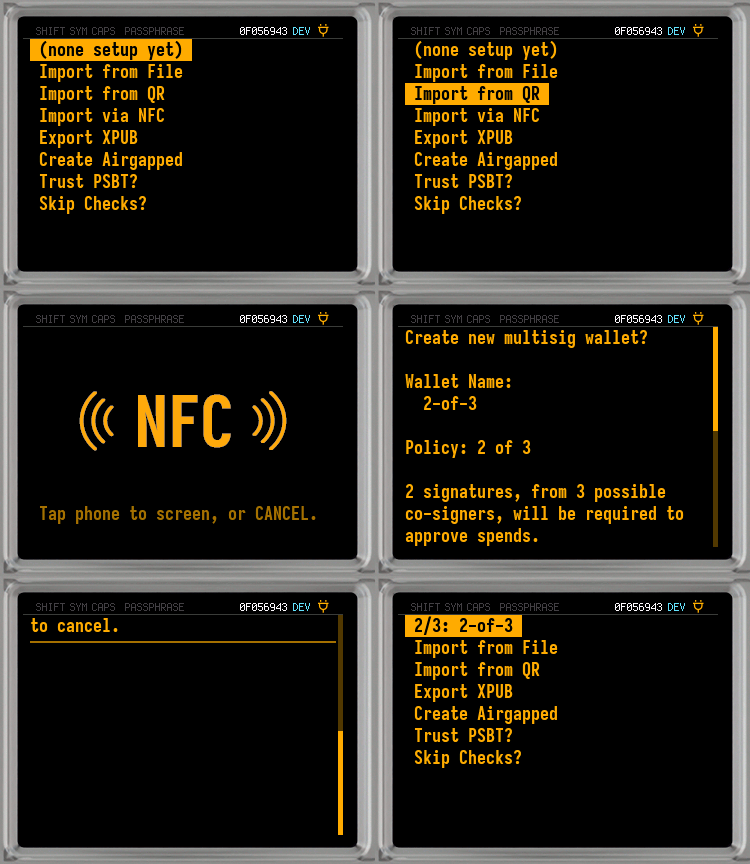
The NFC reader is started. You can tap an NFC enabled device to the COLDCARD to transfer a multisig wallet in an accepted format.
Accepted Formats
The multisig wallet to be imported via NFC must be one of the following formats:
- COLDCARD Export
- BIP-380 Descriptor
Steps to Import a Multisig Wallet via NFC
1. NFC Hardware must be enabled on the COLDCARD.
2. Export the multisig wallet via NFC on another device.
3. On the COLDCARD, select
Import via NFCon the Multisig Wallets Menu.4. Tap the exporting device to the COLDCARD.
5. Review the details.
6. Press
OK/ENTERto import.7. Your multisig wallet has been imported, and can now be found at the top of the Multisig Wallets Menu.
-
Export XPUB#

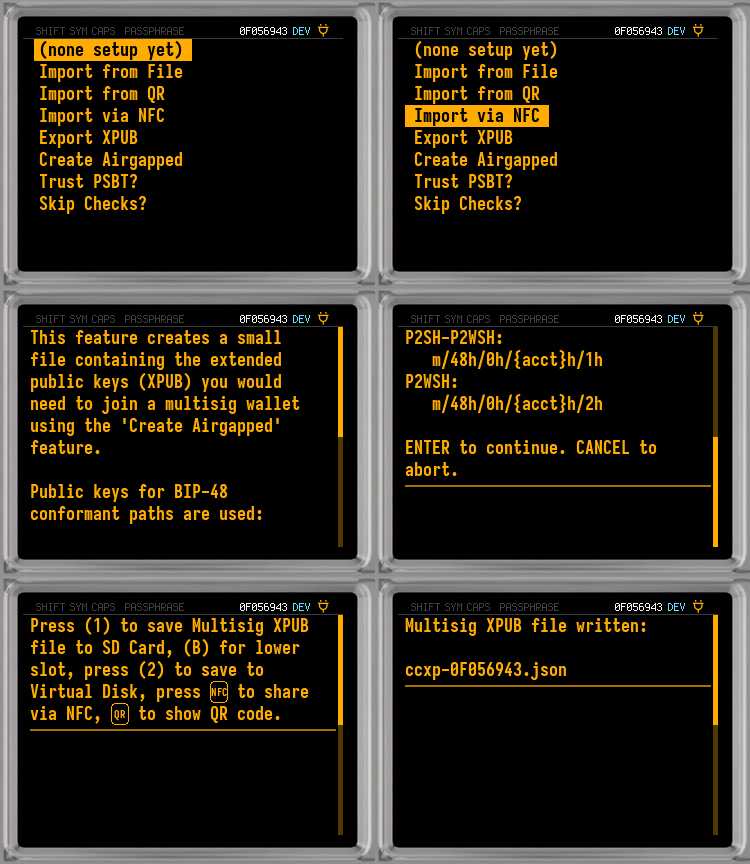
This creates a small file containing the extended public keys (XPUB) you would need to join a multisig wallet.
Public keys for BIP-48 conformant paths are used:
-
P2SH-P2WSH:
m/48h/0h/{acct}h/1h -
P2WSH:
m/48h/0h/{acct}h/2h
Video: Mk4 Export XPUB
Video: Q Export XPUB
Steps to Export XPUB
1. Select
Export XPUBfrom the Multisig Wallets Menu.2. Read the information, press
OK/ENTER.3. Enter an account number, or leave blank for the default account. Press
OK/ENTER.4. Choose how to export:
a. Press
1to export to the MicroSD card (Slot A on the Q).b. On the Q only: press
Bto export to the MicroSD card in slot B.c. Press
2to export to the Virtual Disk (if enabled).d. Press
3on the Mk4, or theNFCkey on the Q, to export via NFC.e. On the Q only: press the
QRkey to export via QR code. -
-
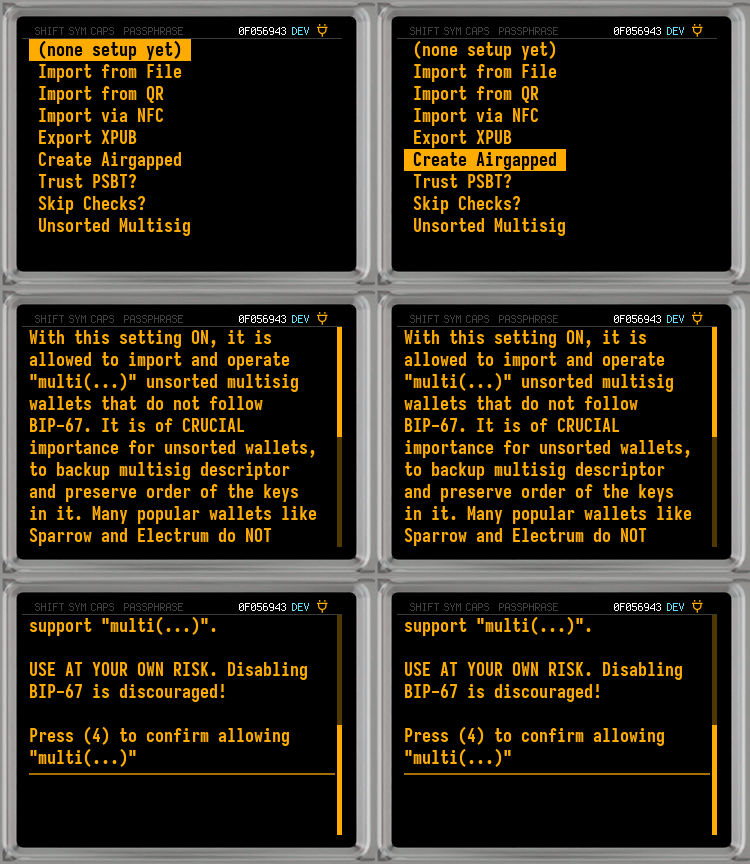
Create Airgapped#

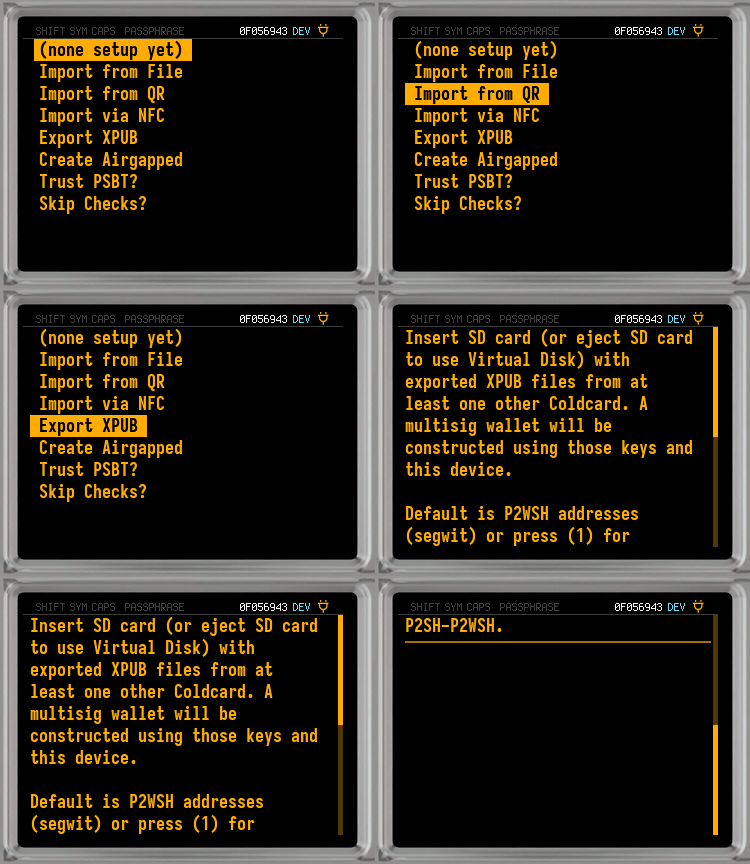
This feature allows the COLDCARD to be used as a multisig coordinator. This enables the creation of airgapped multisig wallets from XPUBS exported from other COLDCARDs.
The number of XPUBs found on the MicroSD card or Virtual Disk will determine the N value (total signers) for the multisig, and can be up to 15.
The user is free to choose any M value (signers needed to spend).
COLDCARD Guide: Airgap Multisig
Video: Create Airgap Multisig
Steps to Create an Airgapped Multisig Wallet

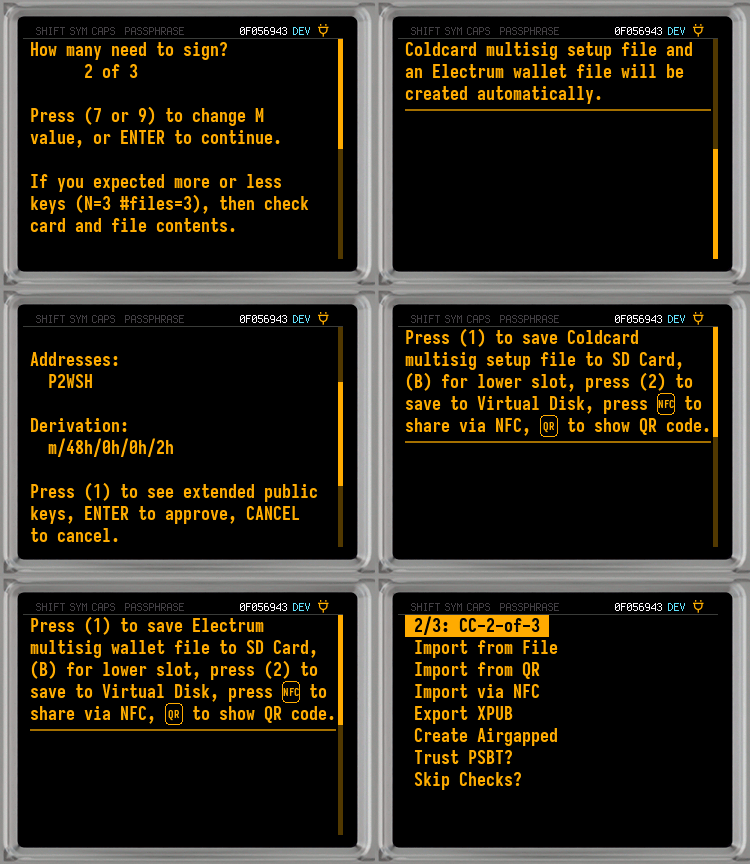
1. Export all the XPUBs you would like to include in the multisig wallet to the MicroSD card or Virtual Disk.
a. If you are using a MicroSD card, insert it into the COLDCARD.
b. If you intend to use the Virtual Disk, make sure there are no MicroSD cards in the COLDCARD.
2. Select
Create Airgappedfrom the Multisig Wallets Menu.a. Q Only: Press the
QRkey to use QR codes (BBQr), or pressEnterto use MicroSD card(s).3. Press
OK/ENTERto use the default P2WSH address type, or press1to use P2SH-P2WSH.4. Use keys
7or9to change the M value (signers needed to spend) of the multisig.5. Press
OK/ENTERwhen the details are correct.6. Review the details of the multisig wallet.
a. At this point you can press
1to see the extended public keys of the wallet.b. If something is not correct with the multisig details you can press
CANCELat this time.7. When the multisig details are correct, press
OK/ENTERto create the wallet.8. Next you will choose how to export the COLDCARD multisig setup file:
a. Press
1to export to the MicroSD card (Slot A on the Q).b. On the Q only: press
Bto export to the MicroSD card in slot B.c. Press
2to export to the Virtual Disk (if enabled).d. Press
3on the Mk4, or theNFCkey on the Q, to export via NFC.e. On the Q only: press the
QRkey to export via QR code.9. Finally, you need to select how to export the Electrum multisig wallet file:
a. Press
1to export to the MicroSD card (Slot A on the Q).b. On the Q only: press
Bto export to the MicroSD card in slot B.c. Press
2to export to the Virtual Disk (if enabled).d. Press
3on the Mk4, or theNFCkey on the Q, to export via NFC.e. On the Q only: press the
QRkey to export via QR code.10. Your multisig wallet has been created, and can now be found at the top of the Multisig Wallets Menu.
-
Trust PSBT?#

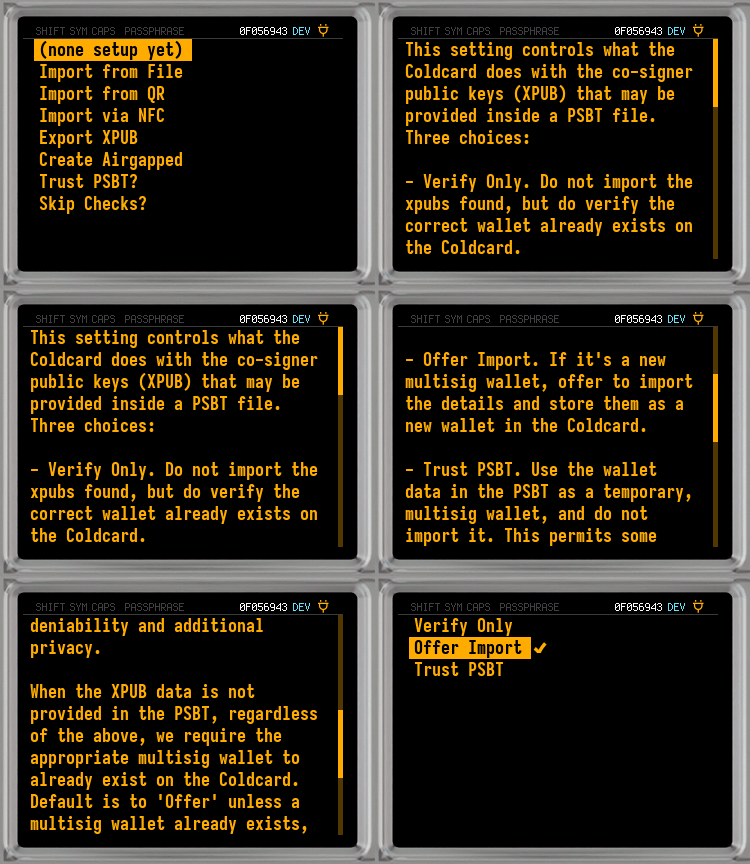
This setting controls what the COLDCARD does with the co-signer public keys (XPUB) that may be provided inside a PSBT file. There are three choices:
Verify Only#
Do not import the XPUBs found, but do verify the correct wallet already exists on the COLDCARD.
Offer Import#
If it's a new multisig wallet, offer to import the details and store them as a new wallet in the COLDCARD.
Trust PSBT#
Use the wallet data in the PSBT as a temporary multisig wallet, and do not import it. This permits some deniability and additional privacy.
Multisig PSBT Defaults
When the XPUB data is not provided in the PSBT, regardless of the above, we require the appropriate multisig wallet to already exist on the COLDCARD. The default is to
Offer Importunless at least one multisig wallet already exists, in which case the default becomesVerify Only. -
Skip Checks?#

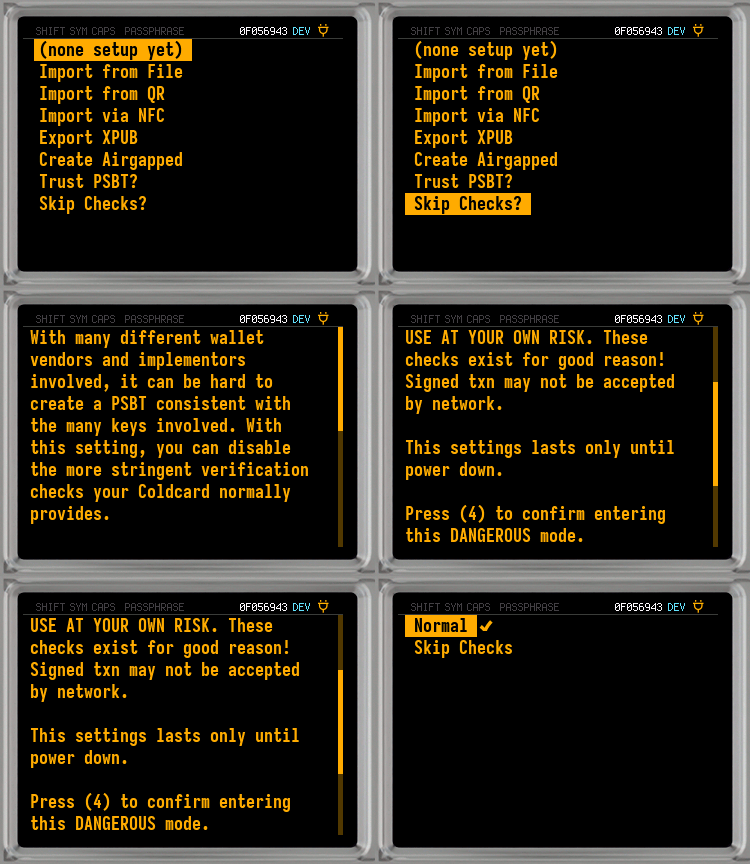
You may disable some of the checks involved in multisig PSBT processing. This permits PSBTs to be signed that may be generated with less-than-perfect software, but which you know are not security hazards.
After reading the warning, press
4to access the Skip Checks Menu. These are your choices:Normal#
All the normal verification checks are done on multisig PSBTs.
Skip Checks?#
Some of the verification checks the COLDCARD typically does on multisig PSBTs are disabled. This can help you to sign PSBTs created by other wallets.
Use at Your Own Risk
These checks exist for good reason! The signed transaction may not be accepted by the network.
This setting only will last until you power down the COLDCARD.
Skip Checks?InformationThis setting is not preserved, and will be reset to
Normalafter each shutdown. -
Full Address View?#

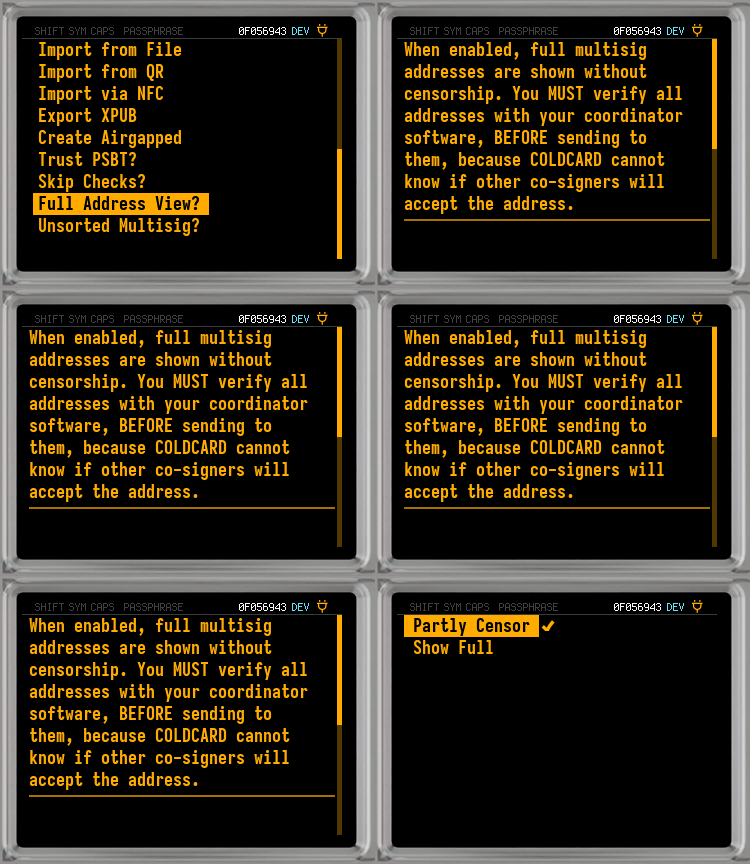
With this setting enabled, full multisig addresses will be shown in the Address Explorer. The default setting is to show only partial addresses.
You should always cross-verify multisig addresses with your coordinator software.
Partly Censor#
Do not show the full multisig address in Address Explorer. This is the default setting.
Show Full#
Show full addresses for multisig wallets in Address Explorer.
NFC Push TX#
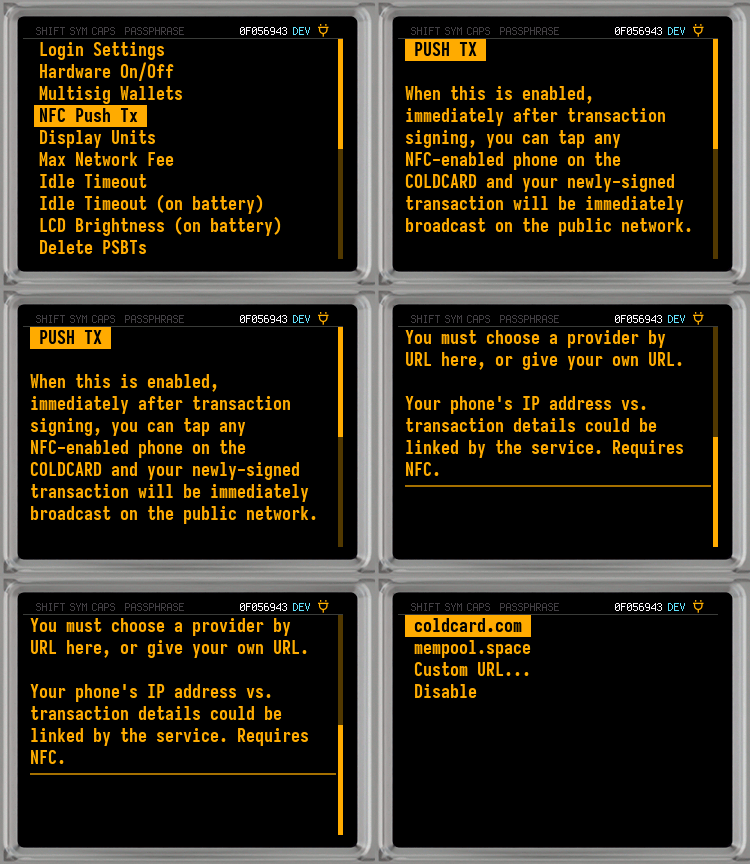
When NFC Push TX is enabled, immediately after transaction signing, you can tap any NFC-enabled phone on the COLDCARD and your newly-signed transaction will be immediately broadcasted on the public network. This provides users with a simple and convenient way to finish sending a transaction while maintaining an airgap.
You must choose from the default providers, or give your own URL.
-
coldcard.com#
This will use the Push TX service hosted by Coldcard.com. The source code for the service can be found here.
-
mempool.space#
Use the Push TX service hosted by Mempool.space. The source code can be found here.
-
Custom URL...#

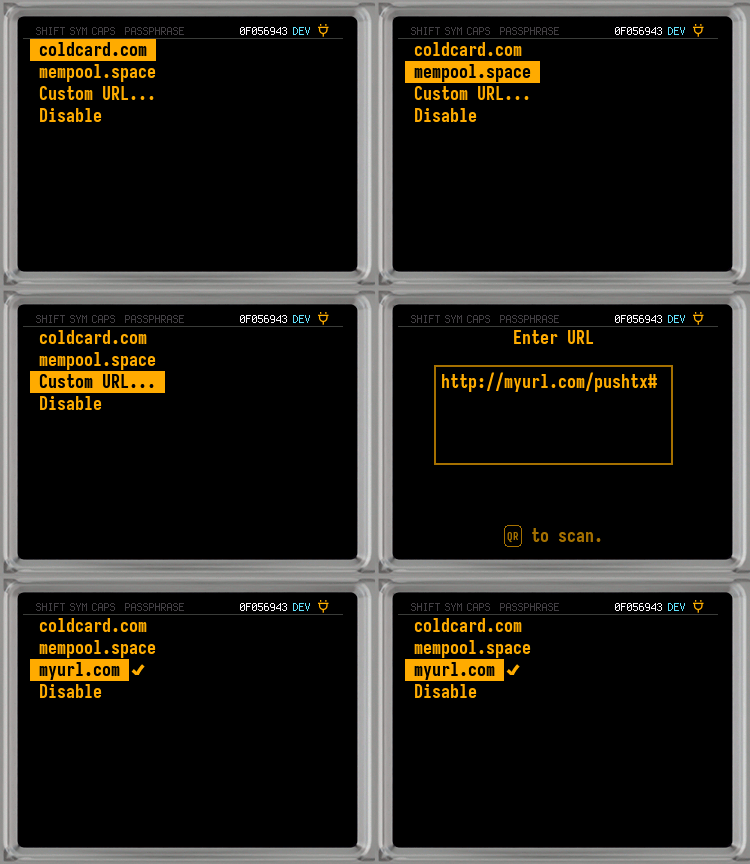
This option will let you enter your own URL that is setup to push transactions.
How To: Host a Push TX Service
-
Disable#
Disable NFC Push TX.
Display Units#
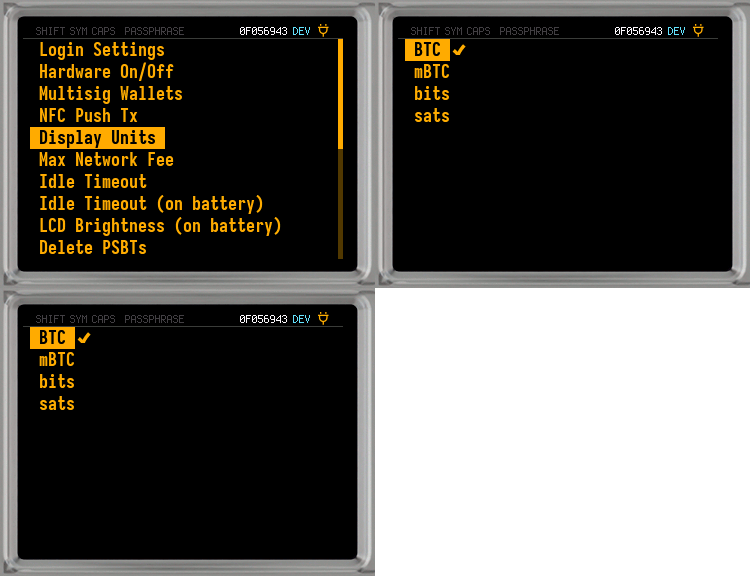
View your funds as BTC (default), mBTC, bits, or sats.
Display Units Menu

Max Network Fee#
Transactions signed by a COLDCARD usually include a small network fee. The network fee goes to the miner validating your transaction. Your COLDCARD will refuse to sign transactions with a fee higher than the percentage you set.
Typically, network fees are minimal compared to the transaction values. Your COLDCARD will always warn you if the transaction fee exceeds 1% of the output value.
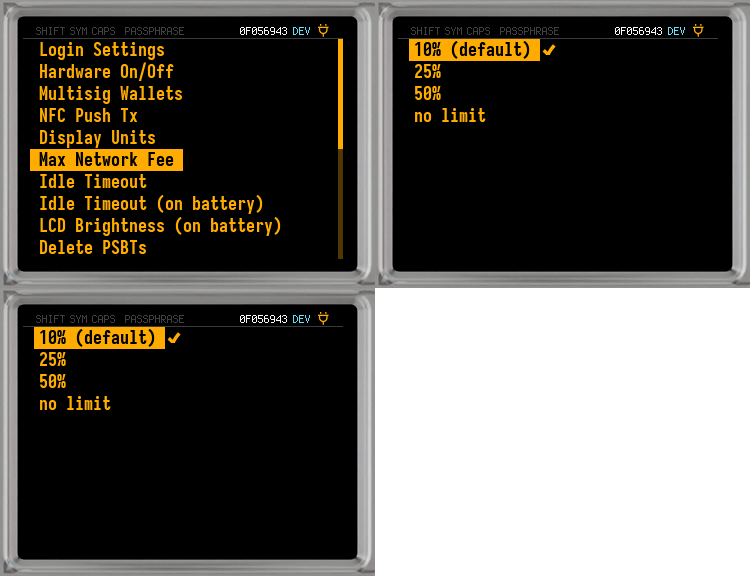
The default hard limit is 10%. You also have the options of 25%, 50%, or no limit. Changing or removing network fee limits does not remove the 1% warning. If the warning appears, you can approve the transaction as usual.
Max Network Fee Menu

Idle Timeout#
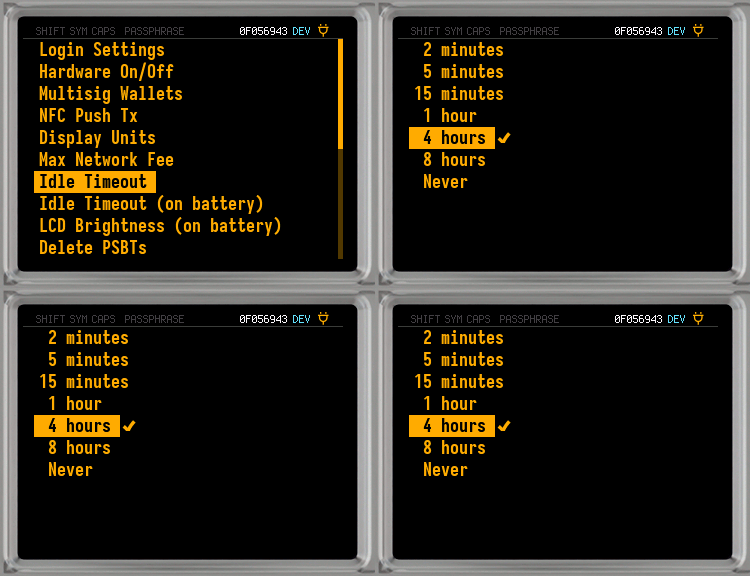
Most people use their COLDCARD to authorize a transaction and then put it away. Typical usage times are brief. Setting the Idle Timeout to match your expected usage time helps prevent "evil maid attacks" where a device left unattended can be compromised.
The default setting for Idle Timeout is four hours. There are preset time limits to select from. You can turn off Idle Timeout by selecting Never.
When the chosen time limit has passed, the screen will display Cleanup . . . as it logs out.
Idle Timeout Menu

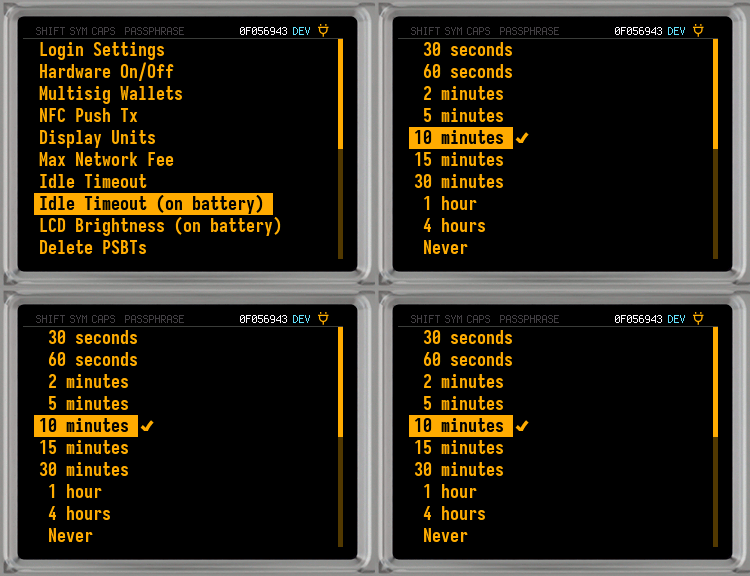
Idle Timeout (on battery)#
Q Only: Same as Idle Timeout, but only when using the Q with battery power. The default setting is 10 minutes.
Idle Timeout (on battery) Menu
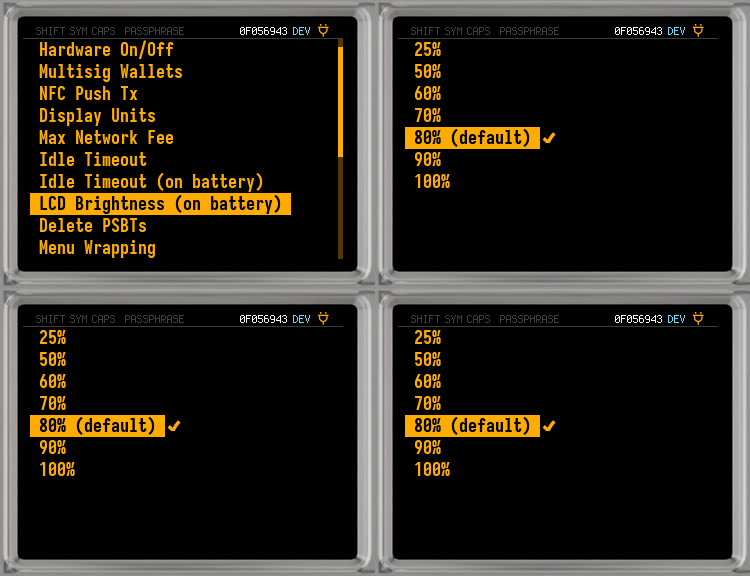
LCD Brightness (on battery)#
Q Only: This controls the brightness of the LCD display while using the batteries. Choose from preset percentages. The default is 80%.
LCD Brightness (on battery) Menu
Delete PSBTs#
PSBT files (on MicroSD card or Virtual Disk) will be blanked and deleted after they are used. The signed transaction will be named <TXID>.txn, so the file name does not leak information.
MS-DOS tools should not be able to find the PSBT data (ie. undelete), but forensic tools which take apart the flash chips of the MicroSD card may still be able to find the data or filename.
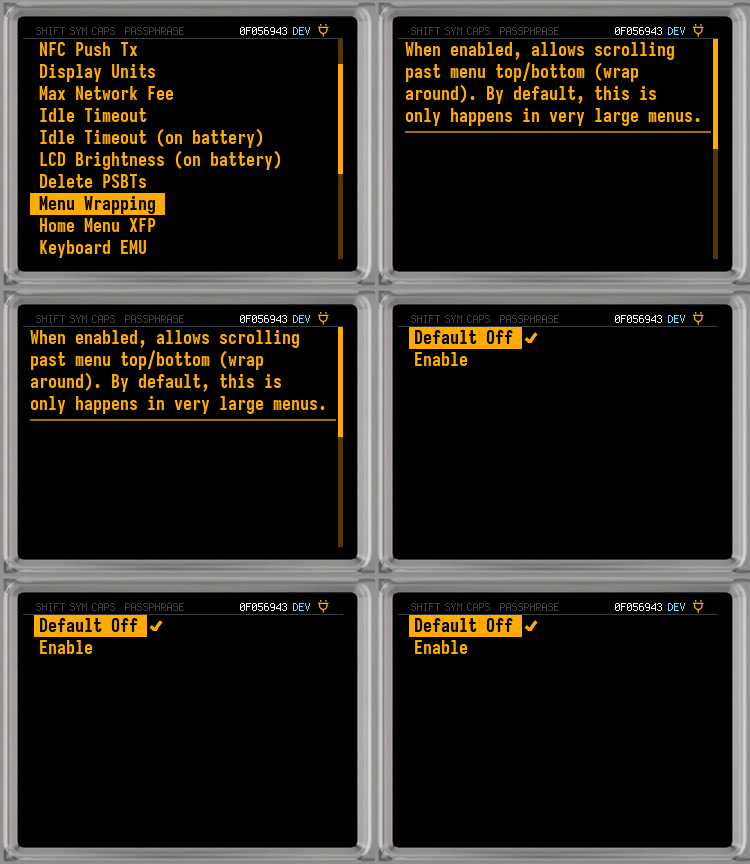
Menu Wrapping#
When enabled, allows scrolling past the top or bottom of a menu. By default this only happens in very large menus.
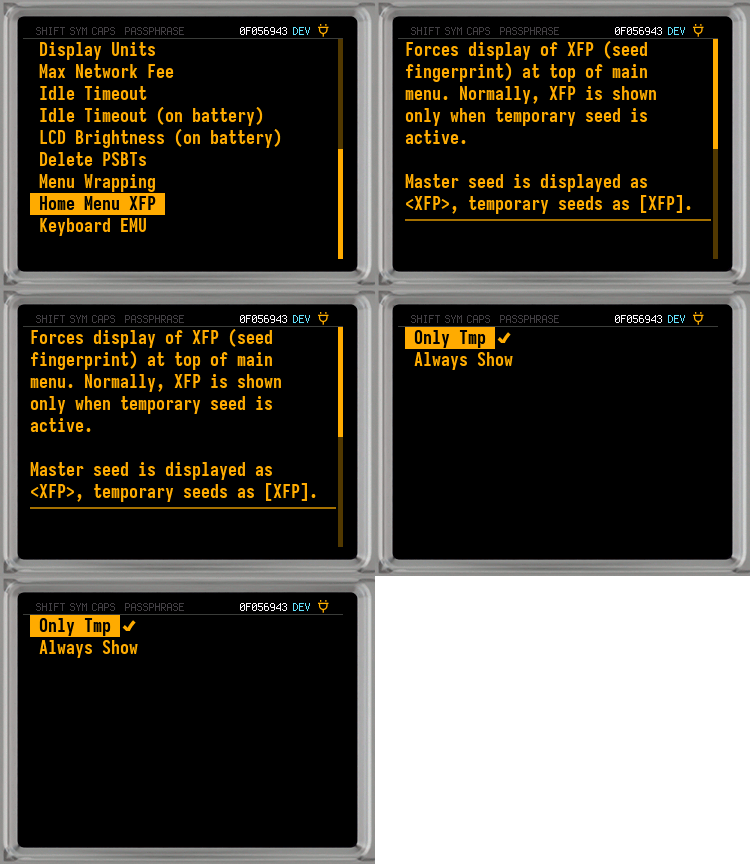
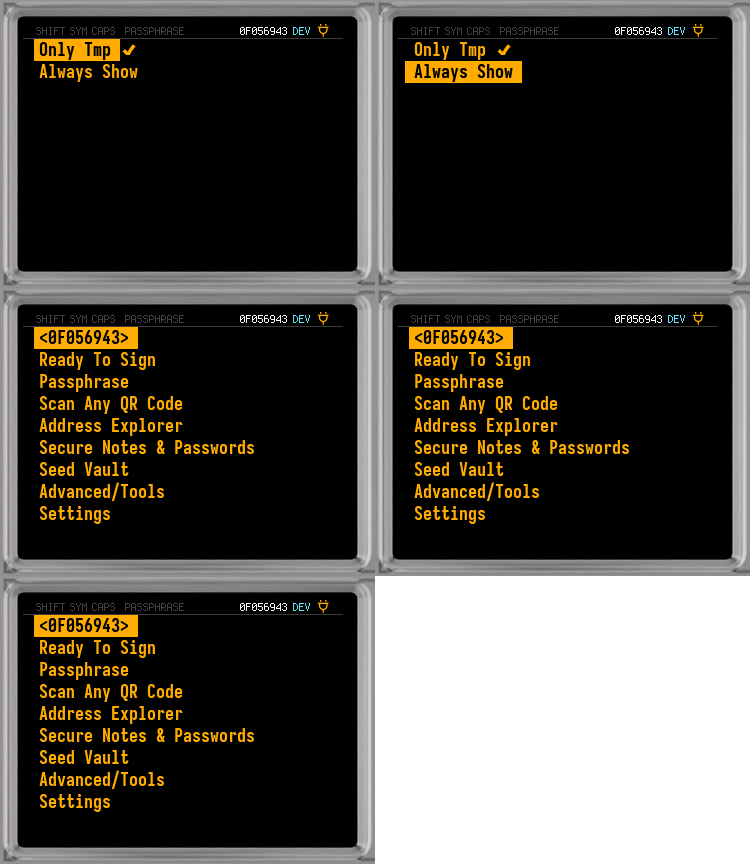
Home Menu XFP#
Forces display of XFP (seed fingerprint) at the top of the Main Menu. Normally, XFP is shown only when a Temporary Seed is active.
Master Seed is displayed as <XFP>, Temporary Seeds as [XFP].
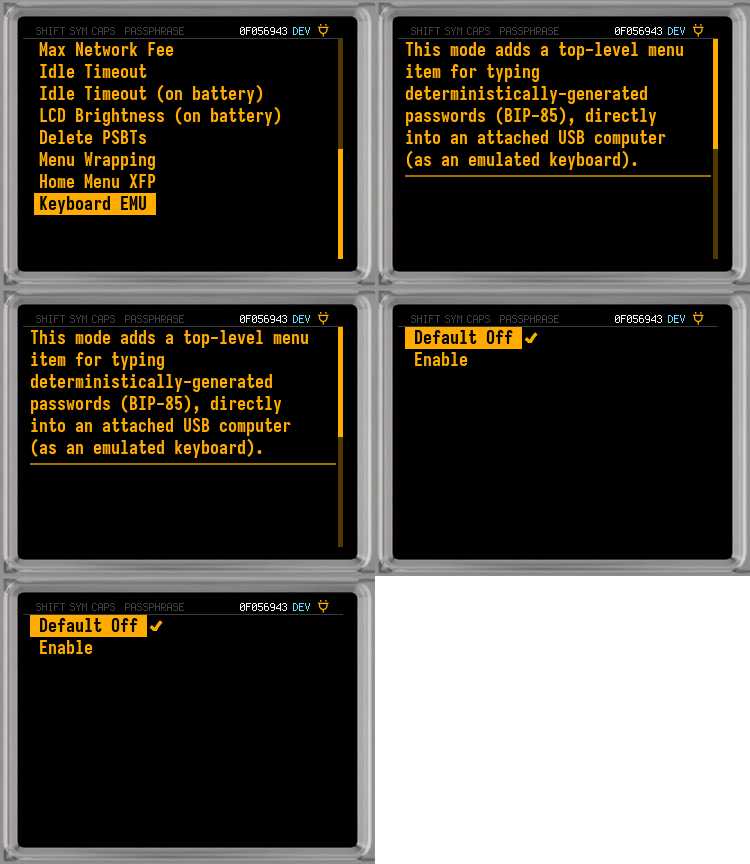
Keyboard EMU#
Adds the Type Passwords option to the Main Menu. When selected, the COLDCARD allows you to type deterministically-generated passwords directly to a computer connected via USB by emulating a keyboard.
The passwords are generated using BIP-85, so the user only needs to enter an account number to get the desired password.
-
Default Off#
The
Type Passwordsoption is not available on the Main Menu. This is the default setting. -
Enable#
Type Passwordsis an option on the Main Menu. Select it to begin keyboard emulation and type passwords over USB.Steps to Type Passwords

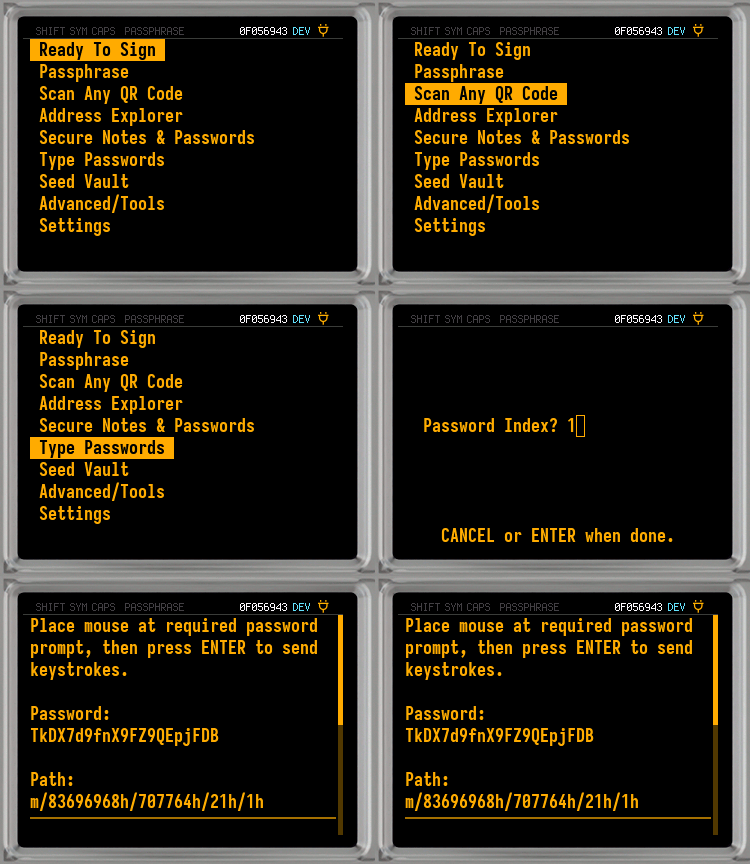
1. Enable
Keyboard EMU.2. Connect the COLDCARD via USB to the computer you would like to type the password on.
3. Select
Type Passwordsfrom the Main Menu.4. Enter the account number for the correct passphrase.
5. Review the details.
6. On the computer, use the mouse to select the prompt where the password should be typed.
7. On the COLDCARD, press
OK/ENTERto type the password.
Obsolete Settings#
Touch Settings (Mk1 only)#
The number pad uses capacitive touch technology. Adjust the touch sensitivity with this menu. In warm or humid environments, or in cases where you see phantom keypresses, choose -2 Sensitive (least sensitive). There is +2 Sensitive for the impatient, which feels quicker and more responsive.

The latest version of the firmware includes five different levels of sensitivity. Please note that less-sensitive modes are a little slower to respond to your touch.
(Removed on Mk2 hardware)
Secondary Wallets (Mk1, Mk2 only)#
In earlier makes of the COLDCARD, there was a concept of a secondary wallet that had most of the features of the main wallet but a separate PIN code and seed words. Due to hardware limitations and security-related changes, we removed this from the Mk3 COLDCARD.
(Removed after Mk2)

