This guide shows you how to sign a Bitcoin transaction with Coldcard Q using QR codes, with no cable or MicroSD card involved. By the end, you will have built a transaction in Sparrow, sent it to Coldcard for review and signing over QR, and returned the signed transaction to Sparrow for broadcast.
For background on the concepts behind this guide, see What is air-gapped signing? and What is a PSBT?.
What is QR code air-gapped signing?
Signing with Coldcard starts with a PSBT (Partially Signed Bitcoin Transaction), built by your coordinator software, Sparrow in this guide. Sparrow constructs the unsigned PSBT and passes it to Coldcard, where your private keys are stored and where the transaction gets signed.
With QR code signing, that PSBT is transferred via QR code, which the Sparrow app displays on your computer's screen and is scanned by Coldcard's camera.
Once Coldcard signs, the signed PSBT travels back to Sparrow the same way, displayed on Coldcard's screen and scanned by your computer's webcam. Neither device ever connects directly to the other, which removes an entire category of risk that comes with connecting your signing device directly to an internet-connected computer.
A single PSBT can be too large to fit in one QR code. Sparrow and Coldcard handle this with two formats:
- Static QR. A single QR code holding the entire PSBT. This works for simple transactions with few inputs and outputs.
- Animated QR (BBQr). Some PSBTs are too large to fit in a single QR code, such as multisig transactions, transactions with many inputs, or large unsigned PSBTs with extra metadata. In these cases, Sparrow and Coldcard switch to BBQr, a format that splits the PSBT across a sequence of QR frames. The receiving device's camera reads each frame until it has the complete file.
Coldcard Q is built for this QR-based workflow. Its built-in camera scans a PSBT QR code directly from the Sparrow app's display, and it shows the signed result as a QR code in return, so the entire round trip happens over QR with nothing else needed. Coldcard Q is available from the Coinkite Store.
Coldcard Mk5 can display a QR code to send a signed PSBT back to Sparrow, but it has no camera and can't scan one in. Coldcard Mk5 owners need MicroSD or NFC for the inbound transaction, covered here:
Before you begin
Before signing your first transaction with QR codes, make sure you have the following ready:
-
Coldcard Q, fully initialized. Your PIN is set and your seed phrase is backed up and stored securely. If you haven't yet set up your device, see Set Up Your Coldcard Q.
-
Sparrow Wallet installed on your computer. Sparrow is the coordinator that will build the transaction, while your Coldcard will sign. If you haven't already, see Coldcard and Sparrow Wallet Setup first, including the address verification step.
-
Bitcoin received into your Sparrow wallet. You'll need a confirmed balance at an address controlled by this Coldcard Q before you can sign an outgoing transaction.
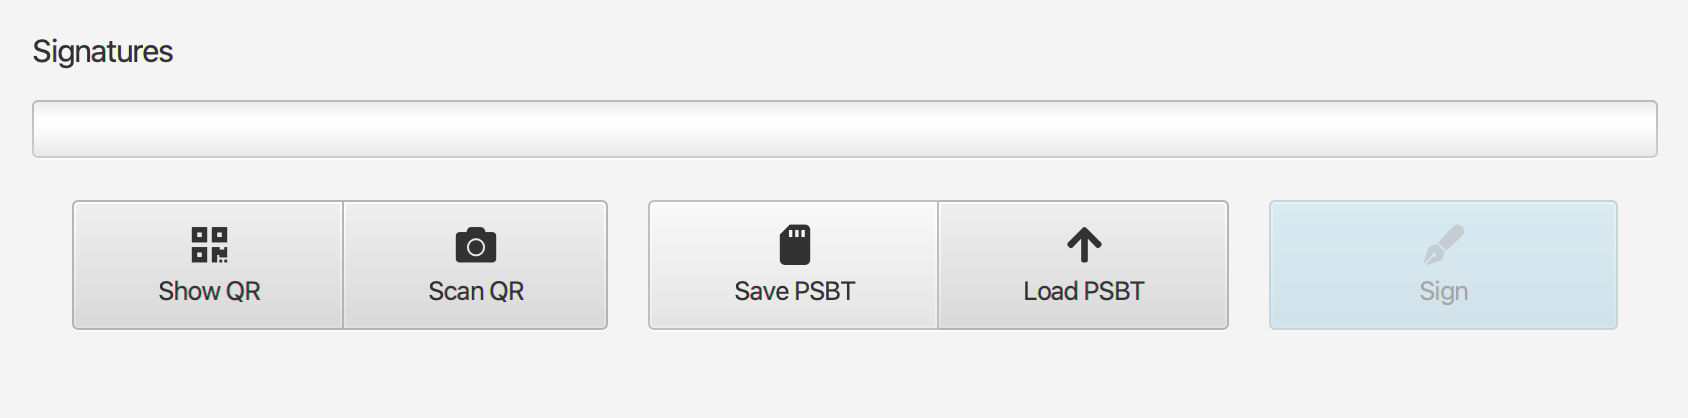
How to sign with QR code
QR signing moves the transaction back and forth as a series of on-screen codes. Sparrow builds the unsigned transaction and displays it as a QR code, Coldcard Q scans it, reviews it, and signs it, then displays the signed result as a QR code for Sparrow to scan back.
To start, power-on and sign in to your Coldcard Q and open the Sparrow Wallet app on your computer, then follow the steps below.
-
In Sparrow, go to the Send tab and build your transaction. Enter the recipient "Pay to" address, the bitcoin amount to send, and the transaction fee rate, then click Create Transaction.
-
Review and finalize the transaction. Review the transaction details, and if everything looks good click "Finalize Transaction for Signing." Sparrow locks in the transaction and prepares it for export to Coldcard.
-
Click Show QR. The Show QR button will be available alongside the Scan QR and Save Transaction buttons. Sparrow will generate the unsigned PSBT as a QR code. If the transaction is too large for a single code, Sparrow automatically switches to an animated BBQr, or will have a Show BBQR button at the bottom.
-
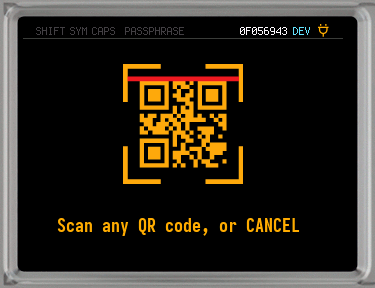
On Coldcard Q, press the QR key. The key is in the top-left of the keyboard, and will activate the camera on the top of the device.
-
Hold Coldcard's camera up to Sparrow's screen until the scan completes. For an animated BBQr, hold steady and Q shows a frame-count progress indicator until it has captured every frame. Q then loads the PSBT and advances to the transaction review screen.
-
Review the transaction details on Coldcard's screen. Scroll up and down to check the recipient address, amount, and fee against what you entered in Sparrow. This is Coldcard's core protection, as this screen reflects what's actually in the transaction even if your computer has been compromised. If anything looks wrong, press Cancel.
-
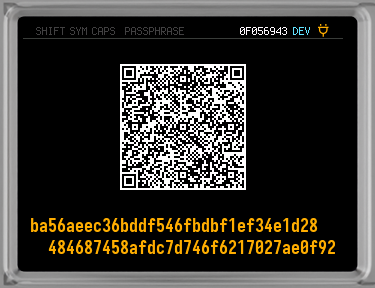
Press Enter key to approve and sign. Coldcard signs the transaction and displays the signed PSBT as a QR code, or BBQr for larger transactions.
-
In Sparrow, click Scan QR This will activate your computer's webcam. You can then hold Coldcard's screen up to face your computer's webcam. Sparrow will read each frame until it has the complete signed transaction.
-
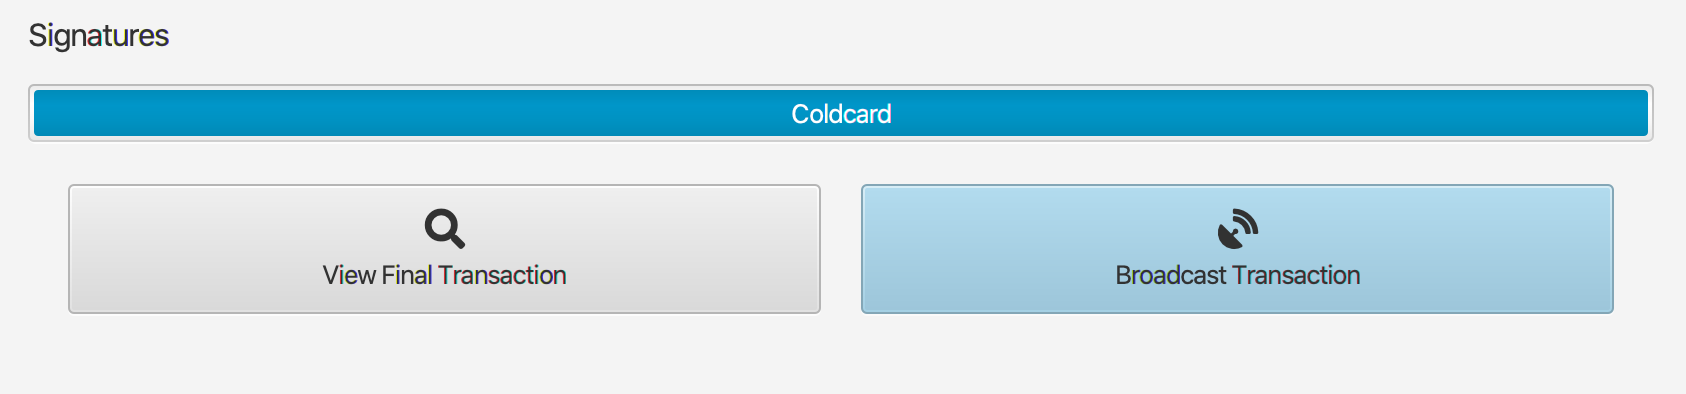
Review the signed transaction. Sparrow displays the transaction with inputs, outputs, fee, and an enabled Broadcast Transaction button.
-
Click Broadcast Transaction. Sparrow sends the signed transaction to the Bitcoin network.
Your transaction is now broadcast and waiting in the mempool until a miner includes it in a block. If you run your own Bitcoin node, Sparrow can check the mempool and confirmation status directly against your node, with no data leaving your setup.
If you don't run your own node, Sparrow checks a public Electrum server instead, which can see which addresses and transactions belong to your wallet. For more on this trade-off, see What is Bitcoin Privacy? and Running a Bitcoin Node.
Signing with a multisig wallet
If your funds are held in a multisig vault, this same QR procedure still applies, with a few differences. This section assumes you've already set up a vault following Build a 2-of-3 Multisig Vault with Coldcard, and that the funds being spent sit at an address belonging to that vault, requiring 2 of the 3 Coldcards to sign.
In the above procedure, Steps 1 and 2 happen once, when the transaction is first built and finalized in Sparrow. After that, steps 3 through 8 repeat for each cosigner: Sparrow exports the PSBT as a QR code, that cosigner's Coldcard scans, reviews, and signs it, and the result goes back to Sparrow as a QR code before the next cosigner's turn.
Below is the procedure for multisig signing via QR code:
-
Build and export the transaction in Sparrow as usual (steps 1 through 3). This happens once for the whole vault, not once per cosigner.
-
The first cosigner runs steps 4 through 8 on their Coldcard. They scan the QR, review the transaction, and sign. Sparrow receives the result back as a QR code, and will now have one signature applied to the PSBT.
-
Click Show QR in Sparrow. Sparrow will then generate the updated PSBT as a new QR code that can be displayed for the 2nd device to scan.
Key Teleport (firmware v1.3.2Q and later) offers an alternative to this round trip through Sparrow. The first cosigner can send the partially-signed PSBT directly to the second cosigner's Coldcard over encrypted BBQr codes, with a Teleport Password shared over a separate channel such as a phone call.
-
The second cosigner runs steps 4 through 7 on their own Coldcard. With the 2-of-3 threshold now met, Coldcard Q (firmware v1.3.2Q and later) finalizes the transaction and returns a ready-to-broadcast
.txnfile instead of another PSBT. -
Continue with steps 8 through 10 above to broadcast. Sparrow loads the finalized transaction and sends it to the network.
Troubleshooting
| Symptom | Likely cause | Resolution |
|---|---|---|
| Coldcard's scan fails or times out before capturing all BBQr frames | QR window closed early, camera obstructed, or insufficient light | Press CANCEL on Coldcard to interrupt the QR transmission and reach the Re-Export Options menu, then choose QR or BBQr again to retry. |
| Sparrow cannot scan Coldcard's signed QR code | No webcam available, or wrong Sparrow option selected | Use File > Load Transaction in Sparrow and transfer the signed PSBT via MicroSD instead, see MicroSD Card Air-Gapped Signing with Coldcard. |
| "Wrong XFP" warning on Coldcard | The PSBT was prepared for a different Coldcard or wallet | Confirm Sparrow is using the watch-only wallet imported from this specific Coldcard. |
| "Troublesome change outs" warning | The change address doesn't match the expected derivation path | Review the change address details on Coldcard. If it belongs to your wallet, approve. If unrecognised, press X/CANCEL and investigate in Sparrow. |
What to do next
You've completed a full QR signing round trip. Every future transaction from this Coldcard wallet follows the same pattern: build in Sparrow, sign on Coldcard via QR, broadcast from Sparrow.
Next guide: MicroSD Card Air-Gapped Signing with Coldcard, the alternative channel for Coldcard Mk5 owners or as a fallback if your webcam isn't available.
Further reading: Bitcoin Air-Gap Signing Methods compares QR, MicroSD, and NFC as signing channels.
On privacy: What is Bitcoin Privacy? covers what a watch-only wallet and public servers can see about your transactions.
Related guides
Set Up Your Coldcard Q
Device setup that precedes this guide: PIN creation, seed generation, and first power-on.
What is Air-Gapped Signing?
The conceptual article that explains what this guide demonstrates.
What is a PSBT?
Explains the partially-signed transaction format used throughout this workflow.
Bitcoin Air-Gap Signing Methods
A technical comparison of QR, MicroSD, and NFC as air-gapped signing channels.